In Part 1 of this series, I disassembled the BBC Microcomputer to clean its components and identified a fault in the power supply. After replacing the damaged and potentially problematic capacitors, the computer powered on successfully, showing the boot screen. However, graphical glitches revealed deeper issues with the machine’s memory, necessitating further investigation and repairs.
Identifying the Problem
When powered on, a BBC Microcomputer should display a black screen with a blinking cursor at the top-left corner. In my case, although the cursor appeared, the screen was filled with repeating blocks of eight dollar signs. Switching to Mode 1 produced vertical white lines on a black background, further confirming that something was amiss.
The BBC Micro’s graphics rely on its memory to store pixel and character data. This memory allocation changes depending on the screen mode. For instance, higher-resolution modes require more memory. The unexpected characters and graphical distortions suggested that specific areas of the memory were not being correctly initialised, pointing to a fault in one or more of the memory chips.
Investigating the Faulty Memory
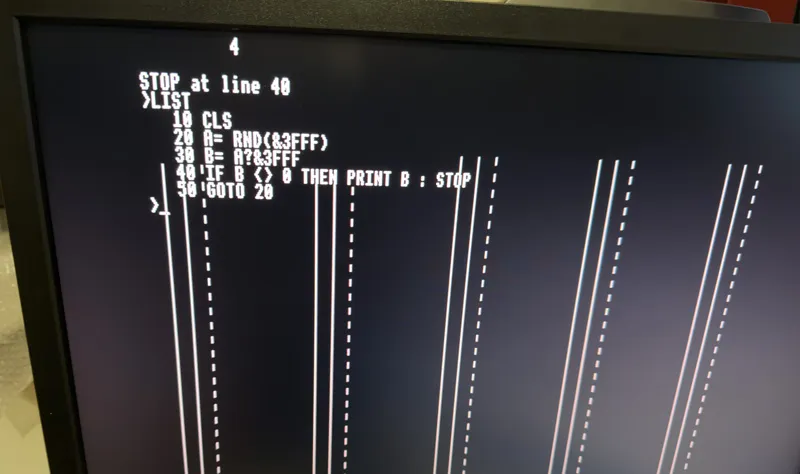
To diagnose the faulty memory chip, I turned to a helpful BASIC program shared by the RetroClinic YouTube channel. The program operates as follows:
10 CLS
20 A=RND(&3FFF)
30 B=A?&3FFF
40 IF B<>0 THEN PRINT B:STOP
50 GOTO 20
This program is designed to repeatedly write and verify data across the system’s memory. If a discrepancy is found, the program halts and displays the problematic memory address. My understanding of this process, though rusty after decades of disuse, is as follows:
- Line 10: Clears the display and sets memory values to zero.
- Line 20: Assigns a random memory address (within the range &0000 to &3FFF) to the variable A.
- Line 30: Reads the value at the memory address stored in A into the variable B.
- Line 40: Checks if B is zero. If not, the program stops and displays the non-zero value. Otherwise, it loops back to Line 20.
Running the Test Program
Running this program on my BBC Micro revealed the value 4, which, when converted to binary, is 0b00000100. This pointed to a fault in the memory chip connected to address line D2. Each address line corresponds to specific memory chips, and on the BBC Micro, address line D2 controls chips IC55 (lower 16K bank) and IC63 (upper 16K bank).
Pinpointing the Faulty Chip
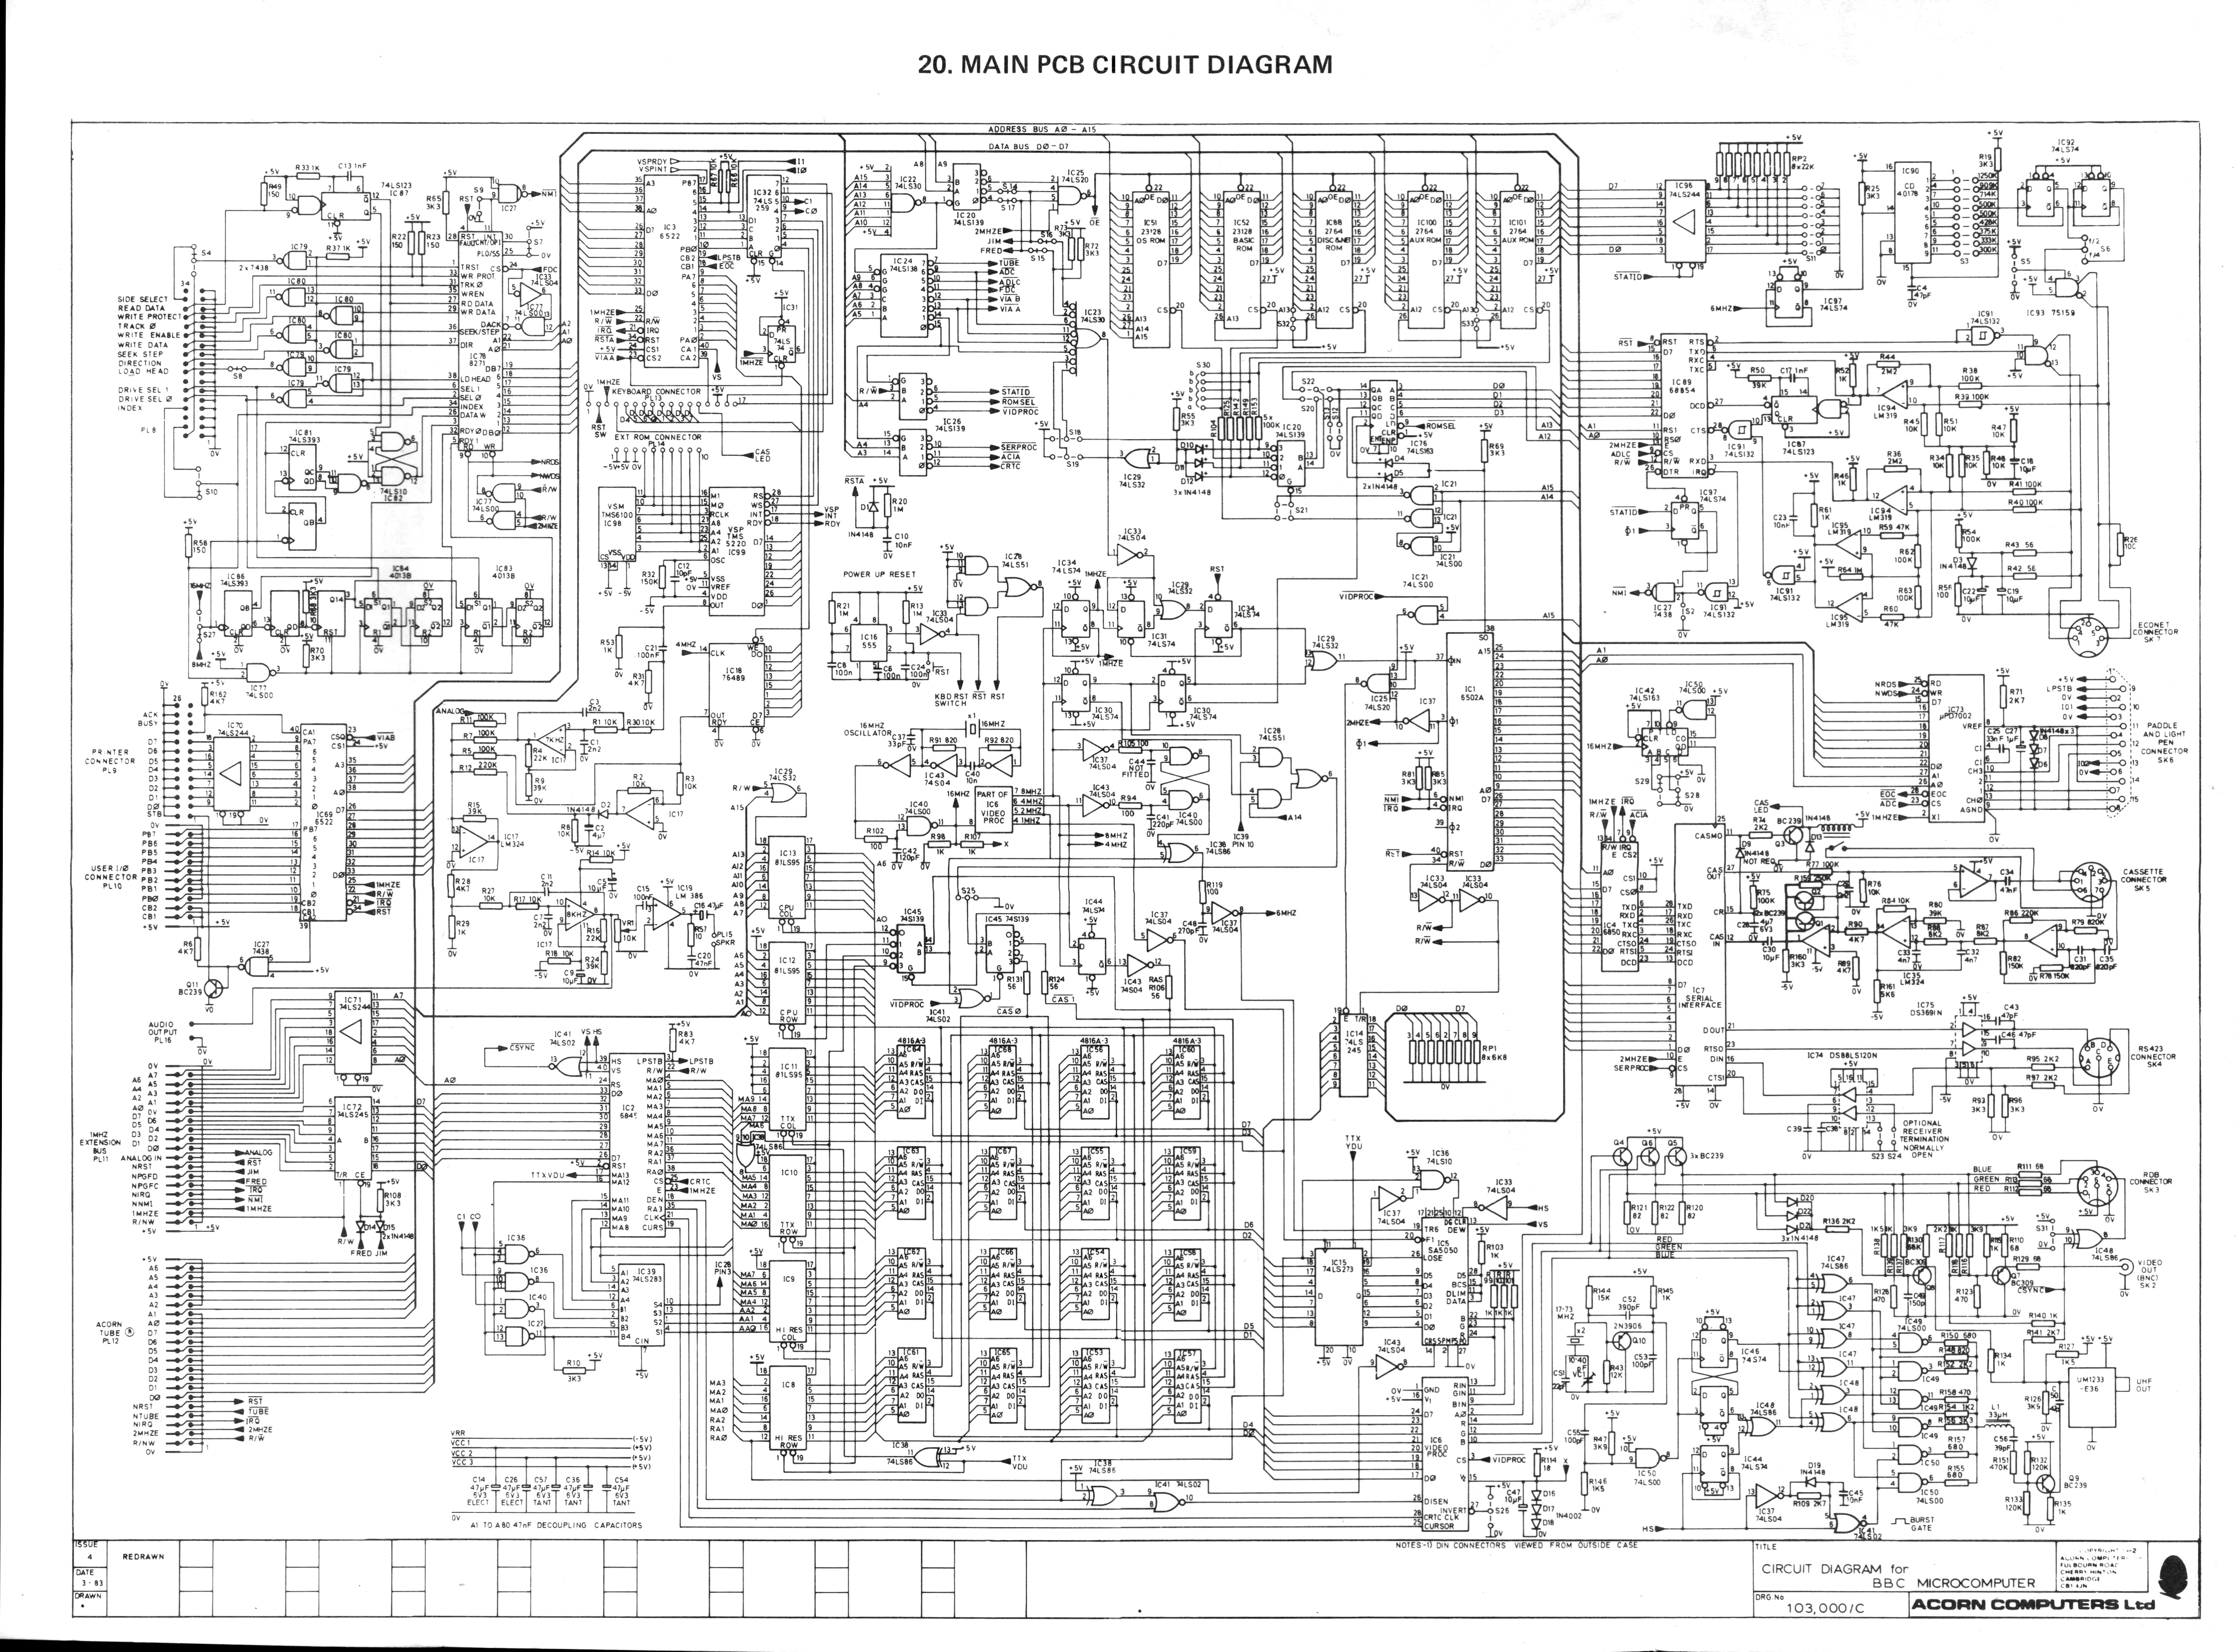
BBC Micro Model B Issue 3 Schematic
To determine which chip was at fault, I adjusted the S25 jumper on the motherboard. This jumper controls which memory bank is active:
- North position: Enables all 32K of RAM.
- South position: Disables the upper 16K bank.
- Jumper removed: Disables the lower 16K bank (an undocumented feature).

S25 Jumper
With the jumper in the south position, disabling the upper bank, the computer emitted a single long beep and displayed nothing. This indicated that the lower bank (including IC55) was likely faulty. Removing the jumper entirely, disabling the lower bank, allowed the machine to boot successfully, confirming that IC55 was the culprit.
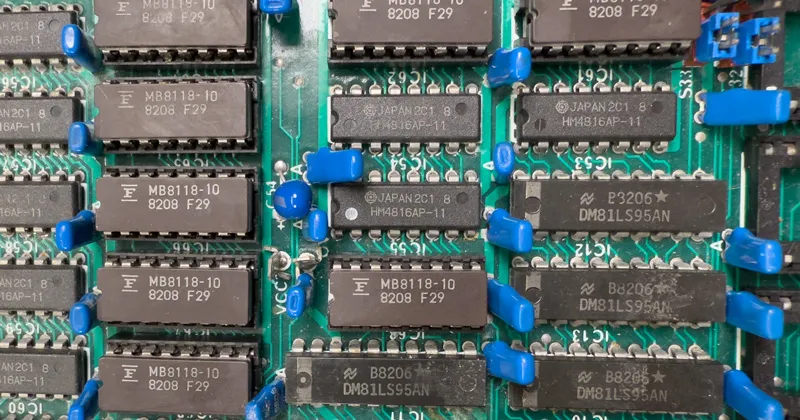
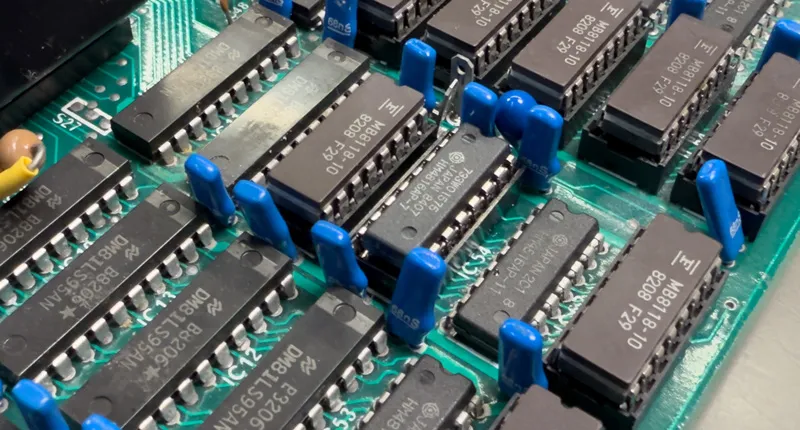
Faulty Memory Chip
Replacing the Faulty Chip
The faulty chip, marked HM4816AP-11, was one of the original RAM chips soldered directly to the motherboard. Finding an exact replacement was difficult, but a similar chip (HM4816AP-7) was available on eBay. The suffix “-7” indicates a faster memory speed, making it a suitable substitute. I purchased a pack of eight for £18, ensuring I had spares for any future issues.
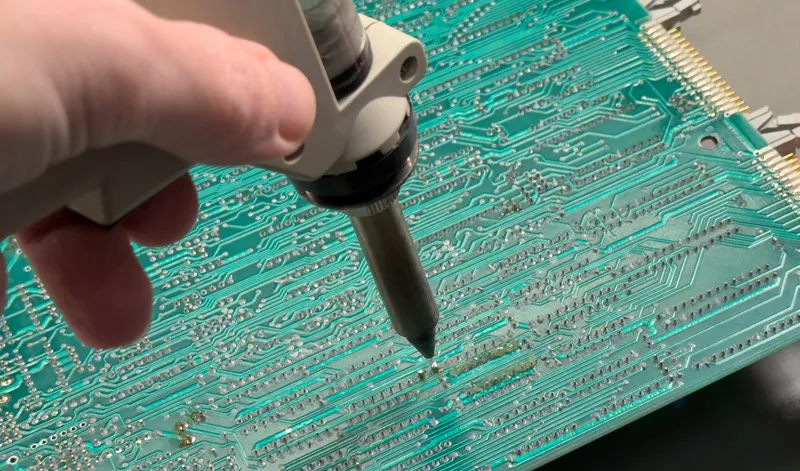
Desoldering the Faulty Chip
With the replacement chips in hand, I carefully desoldered the faulty IC55 using a desoldering gun and installed a socket for easier future repairs. The new chip was then seated into the socket, and the motherboard reassembled.
New Memory Installed
Success!
After powering on the computer, I was greeted by the familiar two-beep sequence, and the screen displayed a black background with a blinking cursor—exactly as it should. Switching between modes confirmed that the graphical glitches were gone, and the BBC Micro was now functioning as it did when new.
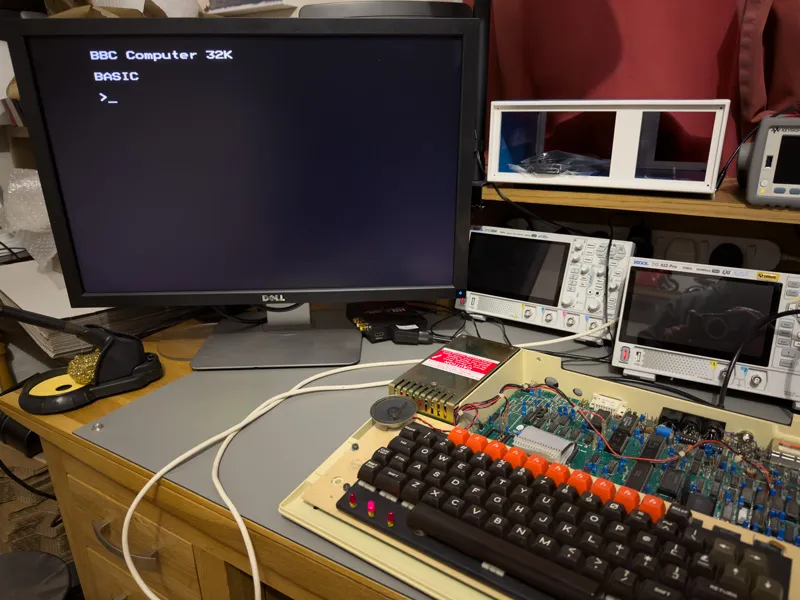
BBC Micro Computer Fixed
Next Steps
With the memory issue resolved, the BBC Micro is ready for its next chapter. The next challenge is to find a reliable way to load software onto the machine. Stay tuned for Part 3, where I’ll explore options for running classic programs and games on this restored vintage computer.