In a recent article I refurbished and repaired two Atari ST computers from the mid 1980s, a 520 STFM and 1040 STFM. The 520 STFM came with a memory upgrade kit but as I planned to give the 520 away and keep the 1040 I wanted to transplant the memory kit from the 520 to the 1040 allowing it to be upgraded to a maximum of 4MB of RAM.
The RAM Upgrade Kit
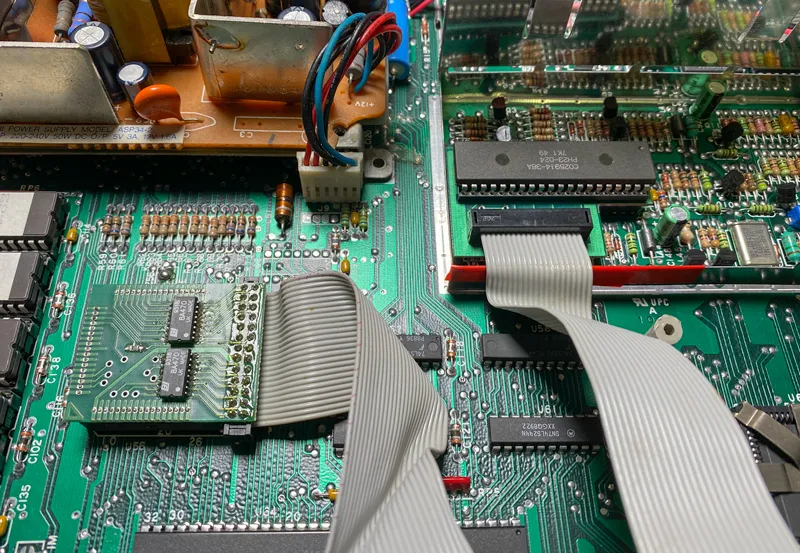
The RAM upgrade kit was manufactured by Marpet Developments in 1992. It consists of three boards joined together with two ribbon cables.
The RAM board contains four 30 pin SIMM sockets. It supports a maximum of four 1MB SIMMs split into two banks. Different size SIMMs are supported but each bank can only use the same size SIMM so for example you can have two 1MB SIMMs in Bank 1 and two 256KB SIMMs in bank 2 but you could not have a 1MB SIMM and a 256KB SIMM in Bank 1.
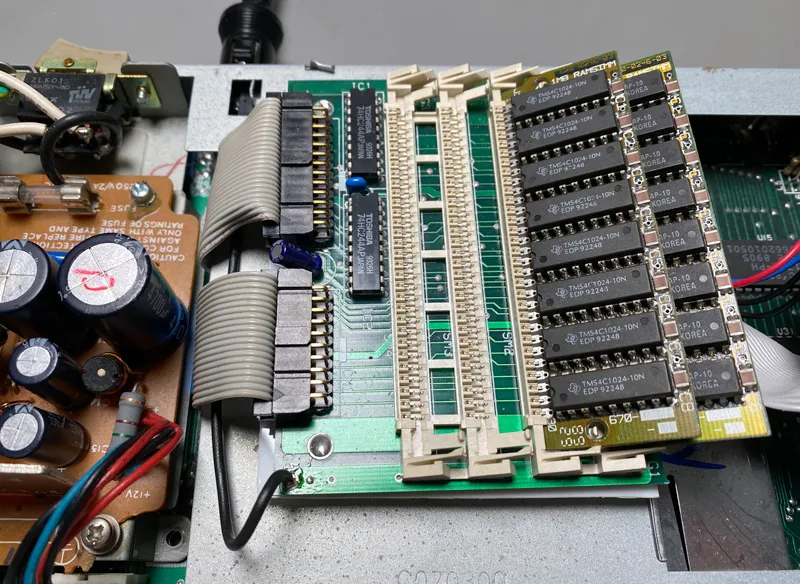
RAM board with space for four SIMMs
The MMU adapter board fits over the top of the MMU (memory management unit) chip on the motherboard. The MMU is mounted in a square socket so the adapter board has a row of pins on the underside which fit in between the pins on the chip and the socket. It takes quite a bit of force to push the adapter down on the chip so care has to be taken not to damage the chip or the socket.
The Video Shifter adapter board sits in between the CO25914-38A video shifter chip, marked U49 on the PCB, and the motherboard. The video shifter is a 40 pin DIP package which is soldered directly to the motherboard. Before fitting the adapter I had to carefully unsolder the chip using a de-soldering gun and fit a DIP socket in its place.
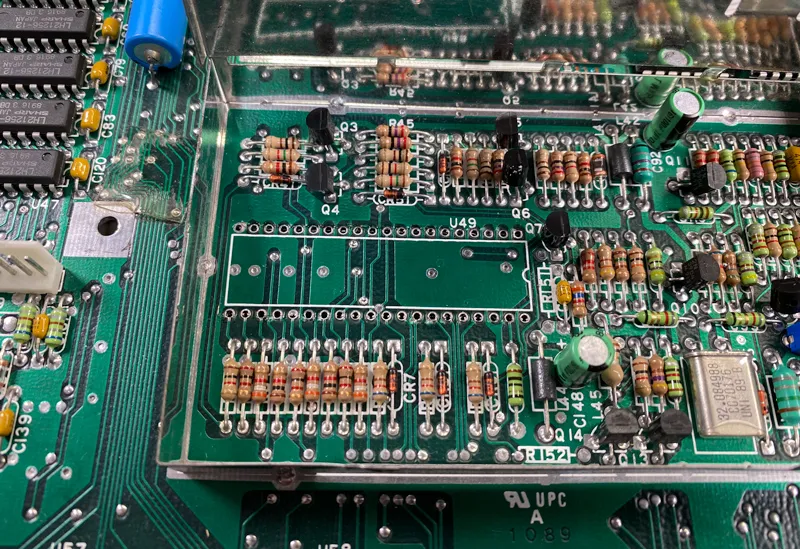
Video Shifter IC removed
The adapter board pushes down into the DIP socket and the video shifter chip goes into a socket on the adapter board. The video shifter is inside a metal shield box which needed to be modified to allow the ribbon cable to exit the box. The top of the shield was bent flat and insulation tape was put on the sharp metal edges to stop them from damaging the ribbon cable.
Ready for Memory Kit Installation
Memory Kit Installed
Disabling the Internal Memory
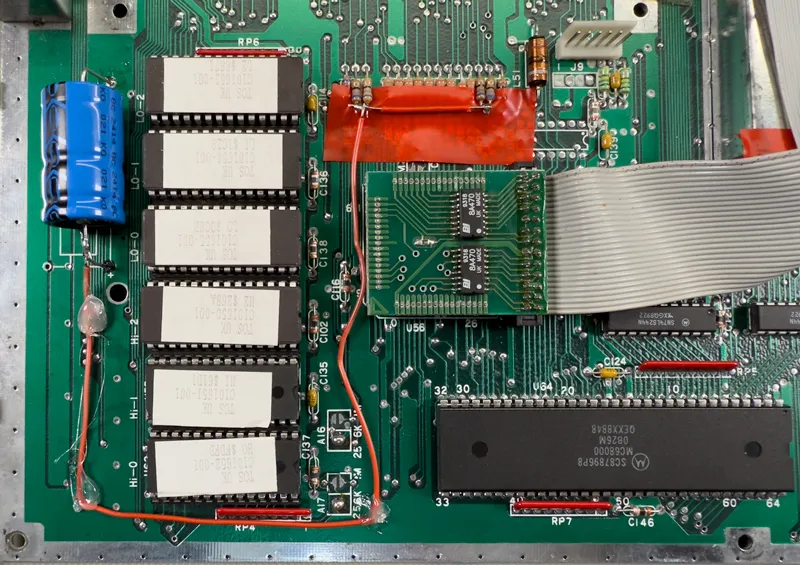
The Atari ST can support a maximum of 4MB of RAM. The 1040 STFM comes with 1MB installed in the form of 32 LH21256 memory chips. The LH21256 is a 256 kilobit dynamic RAM. A byte consists of 8 bits so to store 1 megabyte you need 32 chips. The internal memory is split into two banks of 512KB.
As the maximum RAM supported by the ST is 4MB and the maximum capacity of the upgrade kit is 4MB that does not leave any room for the existing 1MB. To get around this problem the internal RAM needs to be disabled. This is done by cutting the ends of four resistors and connecting them to 5V, pulling them high. On the motherboard version on my 1040 STFM the resistors for disabling Bank 1 are R60 and R61 and Bank 2 are R71 and R72. If I only wanted to add 2MB of SIMMs I could have left bank 1 enabled giving me a total of 2.5MB but as I want to have the option of upgrading to 4MB I disabled both of the internal banks.
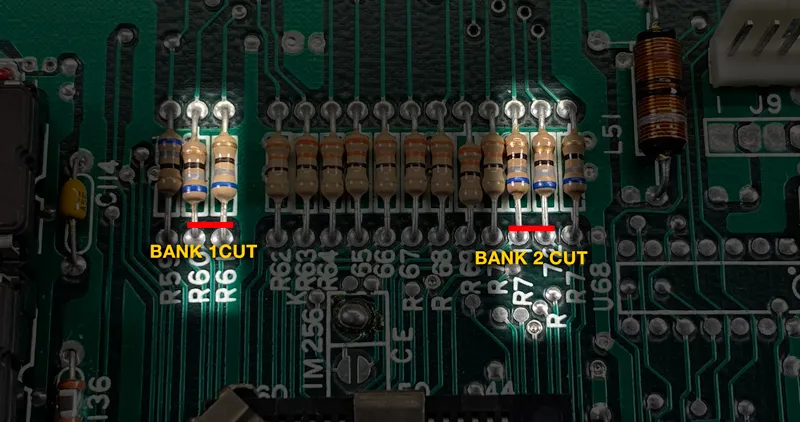
Resistor that control the memory banks
The R60, R61, R71 and R72 resistors were cut away from the PCB on the end closest to the front of the computer. A wire was soldered between the cut ends to join them together and these were in turn connected to the positive end of the large electrolytic capacitor on the left edge of the board. Insulation tape was put under the resistors to stop them from shorting to any other components and hot glue was used to hold the wire down to the PCB.
Resistors modified to disable internal memory
Fitting the memory board
The memory board was fitted to the top of the metal shield that covers the motherboard. A suitable space was found between the power supply and the floppy drive and sticky pads and a layer of plastic were used to hold the PCB in place. The metal shield that covers the power supply needed to be modified to allow space for the ribbon cables.
SIMM Problems
The memory upgrade kit originally came with two 1MB SIMMs. The plan was to use four SIMMs and upgrade it to the maximum 4MB so I looked on eBay and found what appeared to be suitable 30 pin SIMMs. When the SIMMs arrived I put them in the computer and switched it on only to be greeted with a black screen.
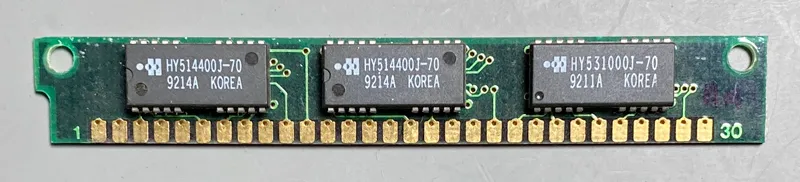
Memory SIMMs that would not work
Fearing the new memory SIMMs were faulty I tried putting the original SIMMs back into the first two slots and two of the new SIMMs into the second pair of slots. This time the computer booted and running sysinfo showed 4MB of memory was available. To test the new memory I found a memory testing program and tried to run it. The original SIMMs tested as working but the two new SIMMs showed errors. The errors were not consistent, sometime it would show only a few dozen errors while running the test while other times it would show thousands of errors.
I tried the same experiment with the two other new SIMMS and found the same problem. While testing different combinations I managed to get the computer to boot with only two of the new SIMMs in the first two slots but the computer quickly crashed when I tried running any software.
After a lot of head scratching, searching around various Atari forums and reading through the manual for the RAM upgrade kit the most likely reason I can find for the new SIMMs not working is that they use two 1MB x 4 bit chips, plus a parity chip which is not used by the Atari ST, while the original SIMMs have eight 1MB x 1 bit chips.
The Atari ST uses DRAM, or dynamic RAM. DRAM needs to be refreshed at regular intervals to keep the data from corrupting. This is done by writing to the address pins every few clock cycles. From what I can find on the internet, the most likely explanation for why the chips are failing is the refresh cycle for the new 4-bit wide memory chips is different than on the old SIMMs and the computer is not refreshing them often enough for the data to remain intact. The manual for the memory kit does mention that you should buy SIMMs that are 8 or 9 chips.
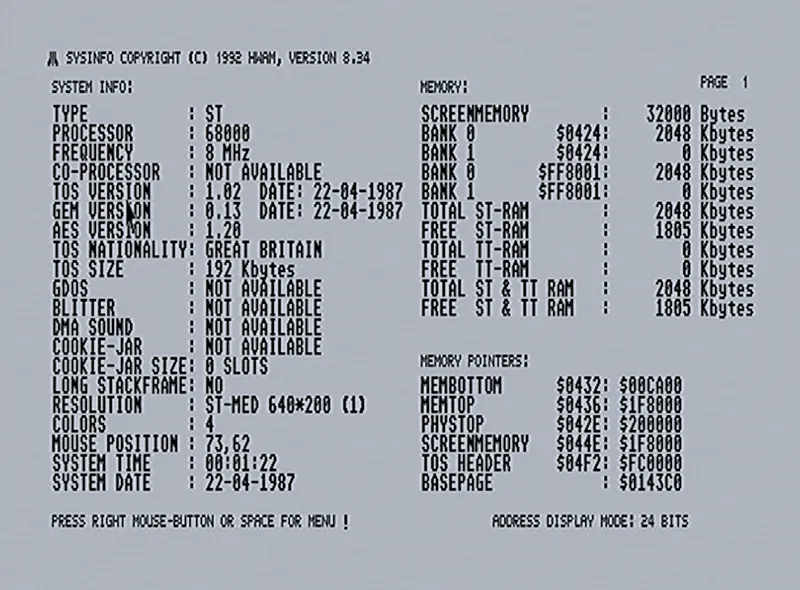
SysInfo Showing 2MB installed
I do not have any way to test the new SIMMs outside of the computer at the moment so I do not know if the problem is with the SIMMs or a compatibility problem with the upgrade kit. Either way as the new SIMMs do not work in the computer, for now I will use the original two 1MB SIMMs and leave the Atari with 2MB of memory. If in the future I find a need for more RAM I will look again for some more SIMMs.