Browsing through the vintage computing section of eBay recently I came across a listing for a BBC Micro computer. It was listed as "For parts or not working" and the description said that it was untested as the owner did not know how it worked. There were some photos of the exterior and interior and it appeared to be in a good condition, no visible damage and the motherboard was free of corrosion so I took a gamble and placed a bid. I won the auction for £66, far less than BBC Micros usually sell for.
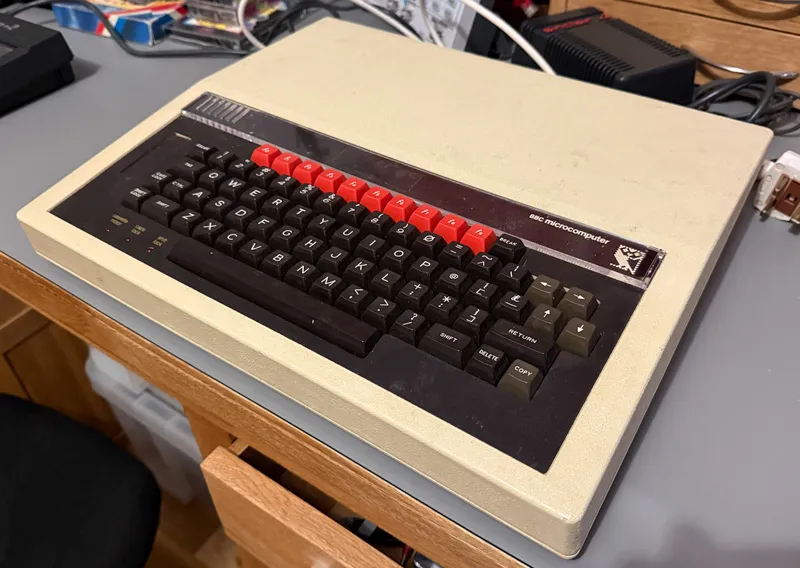
BBC Micro Computer before cleaning
A Brief History of the BBC Micro
For anyone unfamiliar with the The BBC Micro, it was developed in the early 1980s as a response to the BBC’s Computer Literacy Project with the aim to introduce the nation to the possibilities of personal computing. The computer was designed and manufactured by Acorn Computers who later went on to develop the ARM processor that is found in almost all mobile devices today.
Launched in 1981, the BBC Micro Model A and Model B were instantly recognisable by their rugged build and distinctive red function keys. They quickly found their way into schools, homes, and businesses across the UK. The machines were equipped with the MOS Technology 6502 processor, which, paired with Acorn’s custom BBC BASIC programming language.
The BBC Micro was advertised with the following features:
- Full QWERTY keyboard with full cursor controls and 10 user programmable keys. Sealed contact switch construction tested to a minimum of 3,000,000 operations.
- Built-in power supply.
- RAM expandable to 32K bytes.
- ROM expandable to 48K bytes.
- Second 8-bit processor option with a total of 96K RAM.
- 16-bit processor expansion with up to 8 Megabytes of RAM.
- Cassette and disk interface and filing system.
- Teletext and Prestel (Viewdata) interfaces.
- Networking facility (Econet).
- RS232 Interface.
- Centronics printer interface.
- Analogue to Digital Interface (Paddle or joystick).
- Built-in loudspeaker and sound generator.
- Voice synthesiser.
- Elapsed time clock.
Some of the features were only available as additional options and were not included on many of the BBC Micros that were sold.
Despite competition from rivals like Sinclair and Commodore, the BBC Micro carved out a unique place in computing history. In 1981 the British Government launched the £15.1m (£56.9m in 2024) Micros in Schools scheme giving schools a 50% discount on the price of a BBC Micro computer. Every school received the discount and as a result the BBC Micro was the first computer that a generation of children were introduced to.
Its influence extended far beyond the classroom, playing a crucial role in the development of the UK’s software industry and inspiring a generation of engineers and developers.
My Micro Arrives
A few days after making the purchase on eBay the BBC Micro arrived and upon initial inspection it looked like all of the usual components were present and in reasonable condition. There was some dust and grime on the case and motherboard but that is to be expected on a 42 year old computer.
The motherboard is an Issue 3 and based on the date codes on the chips it was manufactured in 1982 or 83. There were several variations of the BBC Micro, mine appears to be either an upgraded Model A or a Model B. It has 32K of Ram and the ADC and RGB ports are present which were missing on the Model A, but the upper 16K of Ram chips are socketed and are a different part code compared to the soldered Ram chips. It does not have the floppy interface or the Econet controller but they were both options on the Model B so their absence does not tell me which version it is. There is space on the motherboard for several ROMs allowing users to add extra functionality like word processors or support for filing systems. My BBC only contained two ROMs for the operating system and the BASIC programming language.
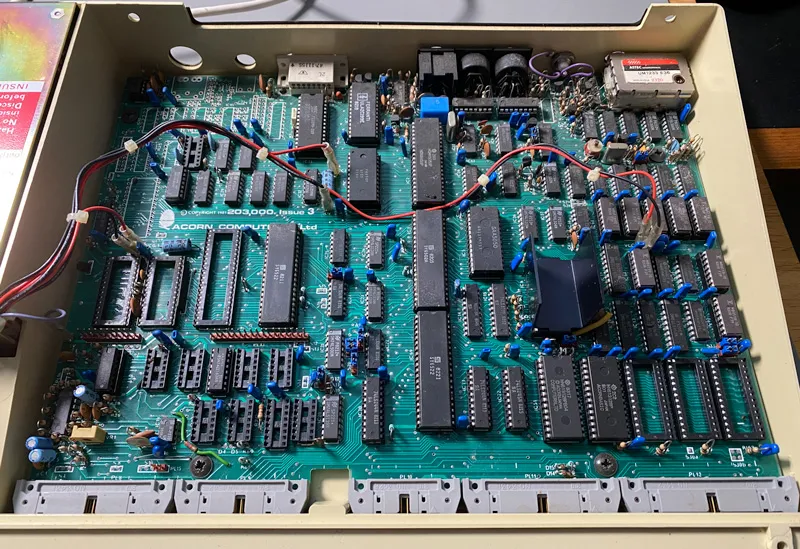
Interior of the Computer
When a new computer arrives the temptation is there to plug it in and see if it works but I knew that with old computers like this one and especially with old BBC Micros that would be a bad idea. Many old computers, this one included, contain RIFA and electrolytic capacitors, both of which age badly and are prone to exploding when they get old. The best case when this happens is a release of smelly smoke and a loud bang. Worst case is the failing capacitors cause voltage surges that destroy other parts of the circuit. The safest option is to replace all of the problematic capacitors before testing the computer, and that is what I would do.
The first step is to disassemble the computer and make a list of all of the capacitors that would need to be replaced. The BBC Micro was designed to be easy to disassemble and repair. It was designed for used in schools and children are good at breaking things.
Four screws remove the top of the case giving access to the motherboard, keyboard and power supply. The keyboard can be removed by disconnecting the ribbon cable that joins the keyboard to the motherboard and removing three bolts.
With the keyboard removed you can now access the whole of the motherboard and power supply. Power is distributed across the motherboard using seven wires from the power supply. This was done to reduce the need for large power traces on the PCB. The power cables were removed and the three plastic bolts on the power supply were unscrewed releasing the supply from the case.
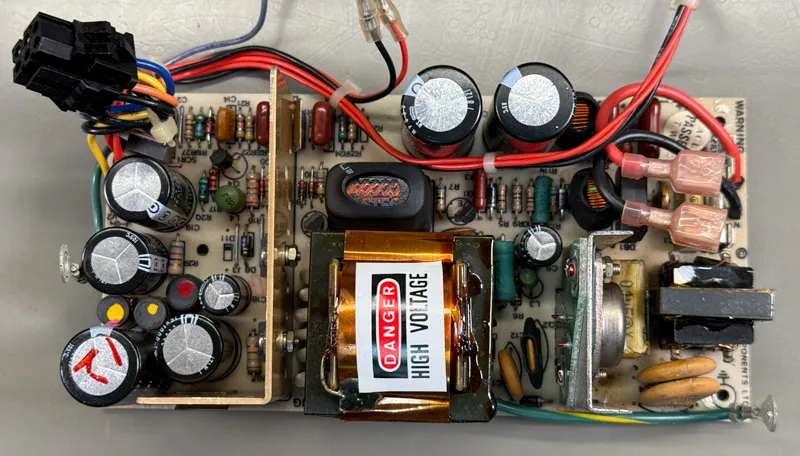
Power Supply Removed from the Computer
The case was given a wash in hot soapy water and the keyboard was cleaned with a damp cloth to remove the decades of grime and dust. Considering the age of the computer the case cleaned up surprisingly well with only a small area of damage in the black vinyl that surrounds the keyboard. This was repaired with a dab of superglue.
The motherboard was covered in a layer of oily grime. This was cleaned using isopropyl alcohol and cotton buds.
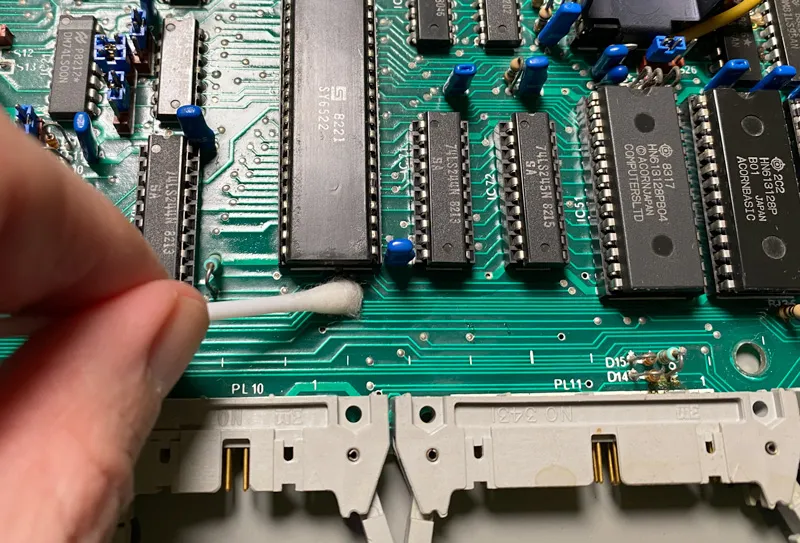
Cleaning the Motherboard PCB
Problems with the Power Supply
As I was disassembling the computer it became apparent that there was a problem as several bits of yellow plastic and metal were sat in the case under the power supply. These were from the RIFA capacitor in the power supply which had exploded.
For anyone unfamiliar with RIFA capacitors they are well known for ageing badly. RIFA capacitors, specifically metallised paper capacitors often branded as RIFA, are commonly used in older electronic equipment as suppression capacitors across the mains input.
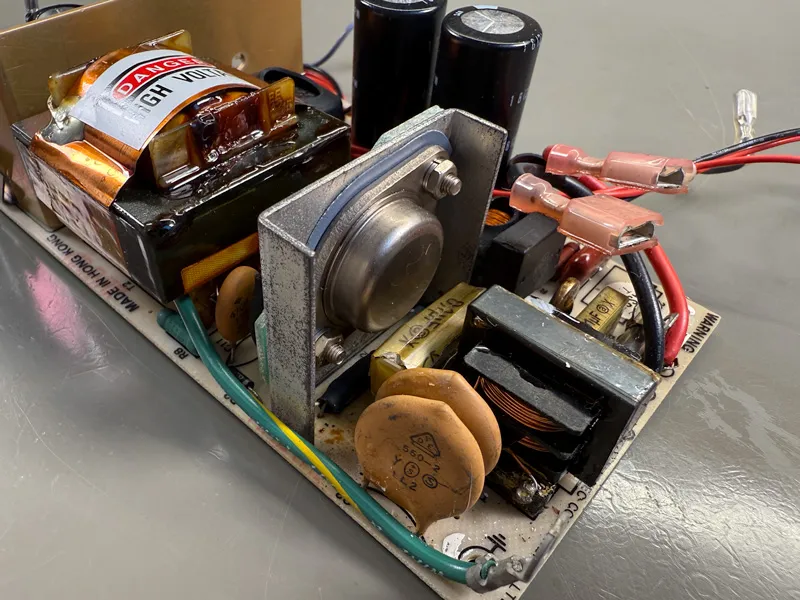
Power supply with old capacitors
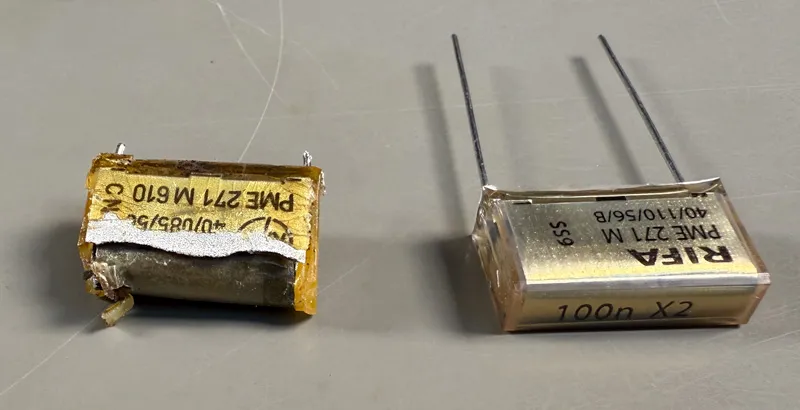
Old RIFA capacitor and its replacement
As they get old mechanical stress or degradation of the paper dielectric can cause them to fail, sometimes explosively, releasing smoke, flames, or fragments. This is a common occurrence when they are stressed or left in operation far beyond their expected service life.
From the evidence of plastic and metal fragments and the RIFA capacitor in the power supply looking like it had swollen to twice its original size it is a fair bet that when it failed it did so with a bang and smoke. This is probably why the computer was listed on eBay as "For parts or not working". Hopefully when the power supply failed it did not damage any of the other components in the computer.
All of the other capacitors in the power supply and on the motherboard looked like they were still intact but I did not want to take any chances so I decided to order replacements for all of the RIFA and electrolytic capacitors.
The power supply contains high voltages which can kill you. Disconnect the power supply from the mains before touching it. The capacitors can hold a lethal charge for several hours or days after disconnecting the power supply so ensure all capacitors are discharged using a bleed resistor before attempting to remove them. If you do not have experience working with high voltages find someone who does.
Below is a list of the capacitors that I used as replacements. In all cases I tried to find capacitors with the same physical dimensions and the same capacitance. Many of them have higher voltage ratings which should increase their lifespan. In some cases the height of the capacitors is smaller as capacitor designs have improved over the last four decades.
Keyboard Capacitors
| REF ID | Original Part | Replacement Part |
|---|---|---|
| C4 | 22µF 16V 14mm x 5mm Axial Lead Electrolytic | VISHAY MAL202138229E3 22µF 63V 10mm x 6mm Axial Lead Electrolytic |
Power Supply Capacitors
| REF ID | Original Part | Replacement Part |
|---|---|---|
| C1 | 0.01µF - 15mm lead pitch RIFA | EPCOS B32912B5103K000 Safety Capacitor, Metallized PP, Radial Box - 2 Pin, 0.01 µF X1 |
| C2 | 0.1µF - 19.5mm lead pitch RIFA | KEMET PME271M610MR30 Safety Capacitor, Metallized Paper, Radial Box - 2 Pin, 0.1 µF X2 |
| C9 | 220µF 10V - 10mm x 17.5mm - 5mm lead pitch | WURTH ELEKTRONIK 860160675026 Electrolytic Capacitor, 220 µF, 50 V |
| C6, C8 | 100µF 250V - 18mm x 42mm - 7.5mm lead pitch | WURTH ELEKTRONIK 860021380020 Electrolytic Capacitor, 100 µF, 400 V |
| C18, C21 | 100µf 25v - 10mm x 17mm - 5mm lead pitch | WURTH ELEKTRONIK 860130675006 Electrolytic Capacitor, 100 µF, 50 V |
| C16, C19, C20 | 1000µf 16v - 16.3mm x 26mm - 7.5mm lead pitch | WURTH ELEKTRONIK 860080680024 Electrolytic Capacitor, 1000 µF, 50 V |
| C17 | 2200µf 16v - 18mm x 37mm - 7.5mm lead pitch | WURTH ELEKTRONIK 860160480034 Electrolytic Capacitor, 2200 µF, 25 V |
Motherboard Capacitors
| REF ID | Original Part | Replacement Part |
|---|---|---|
| C2 | 4.7µF 40V 11mm x 5.2mm Radial Lead Electrolytic | PANASONIC EEUHD1H4R7Electrolytic Capacitor, 4.7 µF, 50 V |
| C5, C9 | 10µF 10V 11mm x 5.2mm Radial Lead Electrolytic | PANASONIC ECA1HM100B Electrolytic Capacitor, 10 µF, 50 V |
| C14, C26 | 47µF 10V 13mm x 6.2mm Axial Lead Electrolytic | VISHAY MAL202137479E3 Electrolytic Capacitor, 47 µF, 40 V |
If you are planning to replace the capacitors in your BBC Micro compare the list against the components used in your computer as different motherboard and power supply versions may have used different value or size capacitors.
All of the capacitors used were either Panasonic, Wurth Elektronik or Vishay brands. All three companies produce high quality components that should last for many years to come. I used all Wurth Elektronik capacitors in the power supply as they come in a nice red colour that makes it easy to see that the power supply has been serviced since it was originally manufactured.
Each capacitor was removed in turn and swapped with its new replacement. Care was taken when heating the solder pads as old copper traces can be easily torn away from the PCB if too much heat or force is applied. Several of the capacitor leads had been folded over on the bottom of the PCB which made removal more difficult.
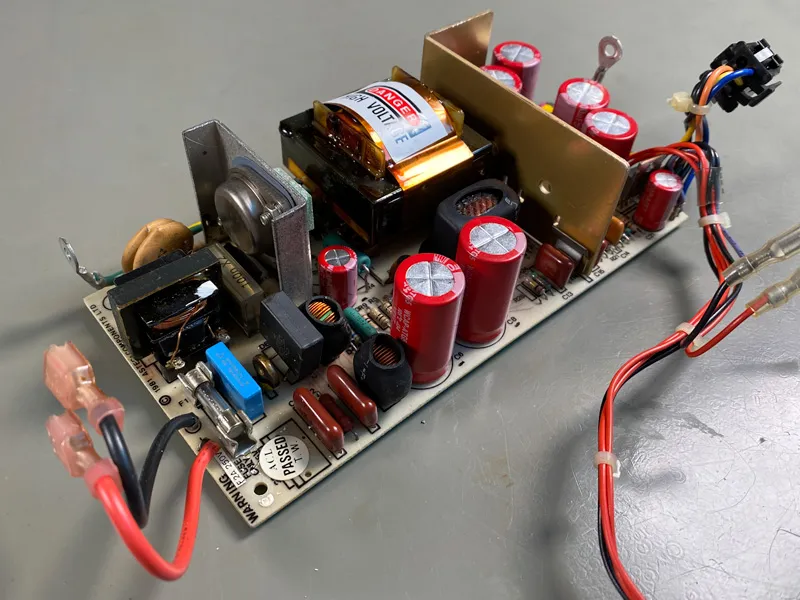
Power supply with new capacitors
The RIFA capacitor was especially problematic as it had swelled up so much that it no longer fitted between the heatsink and other surrounding components so some wiggling and squashing with pliers was required to remove it.
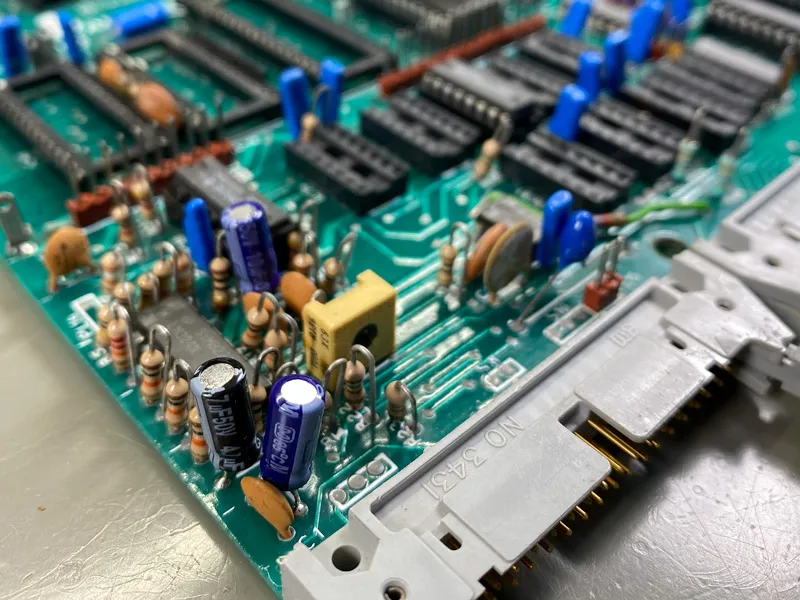
Motherboard with new capacitors
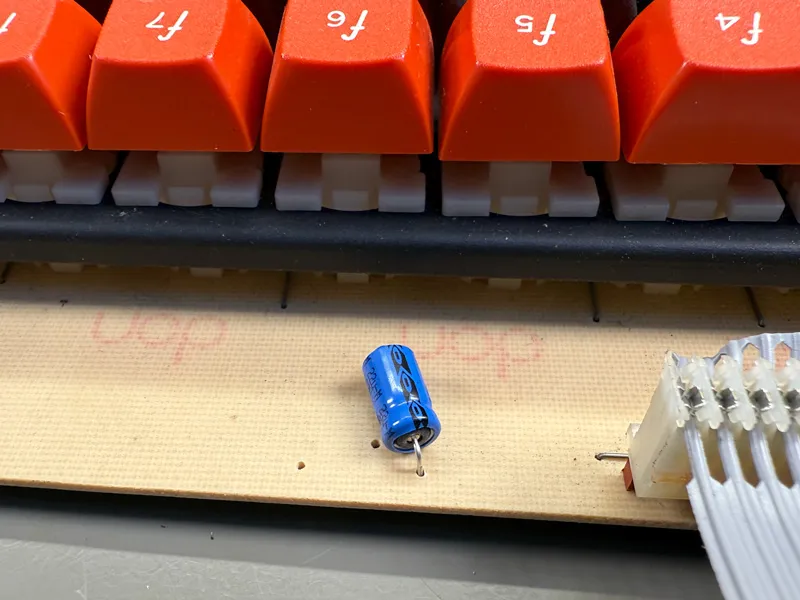
Keyboard with new capacitor
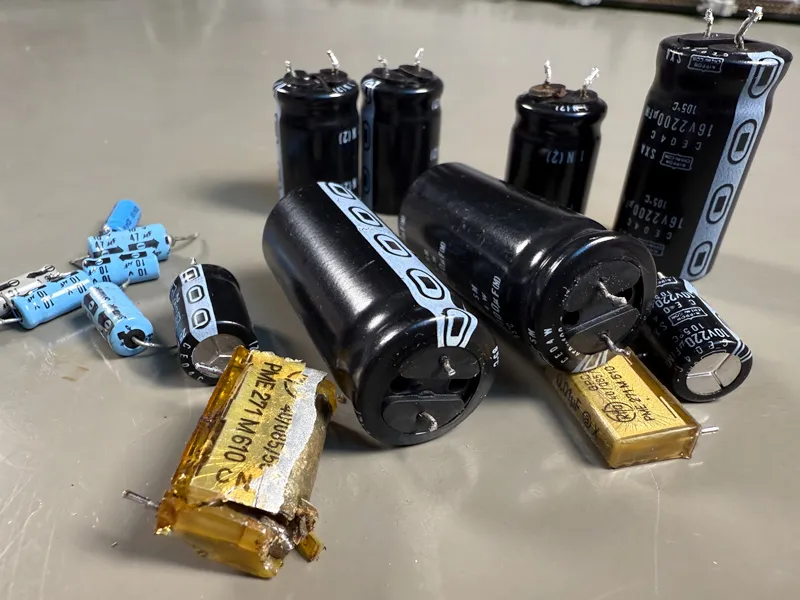
All of the old capacitors that were replaced
Testing
With all of the capacitors replaced on the power supply, motherboard and keyboard the first step before reassembling the computer was to test the power supply to ensure it was producing the correct voltage. A small load was attached to the 5V output and the voltage was measured with a multimeter. The voltage was 5.1V which is close enough so the computer was reassembled and powered on with an RGB video cable connected to a monitor.
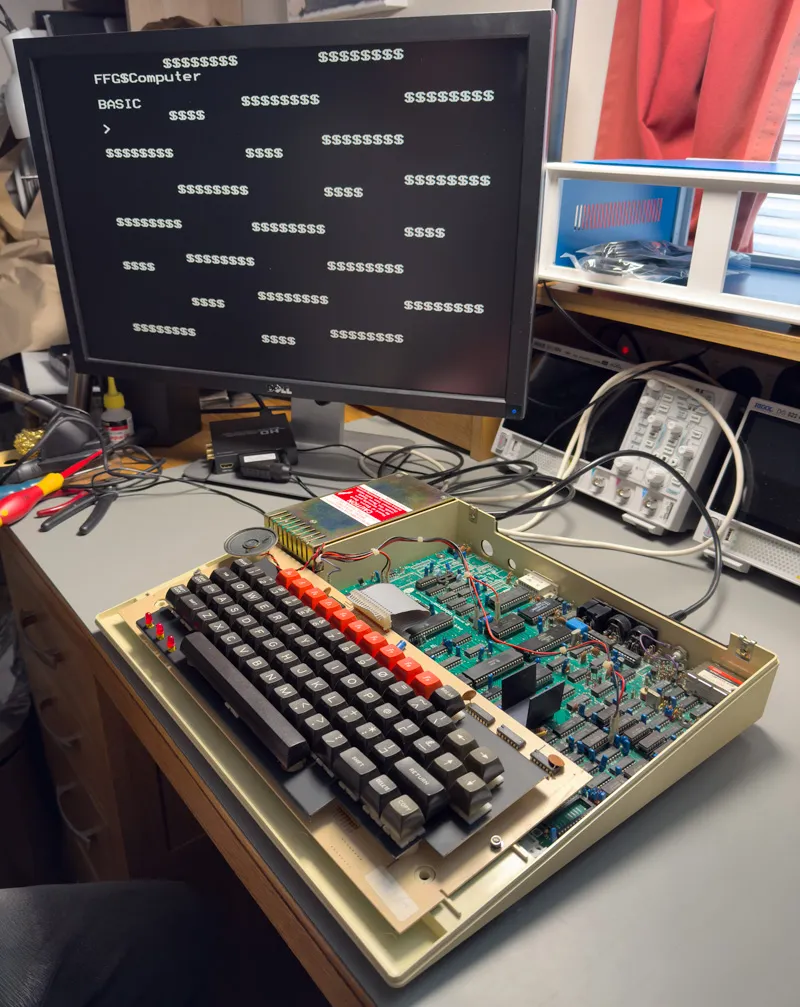
The computer powered on, the Caps Lock LED lit up like it is supposed to and the speaker produced two beeps to show that it had booted. The display showed a boot screen with 32K of RAM listed but something was wrong. There were dollar signs in random places across the display. This is a bad sign as it means something is not working correctly. It looks like the damage was not limited to the power supply but that will have to wait until the next article.
