This is the third instalment in a series on restoring and upgrading a BBC Micro Model B computer from the 1980s.
In Part 1, I cleaned the computer, repaired the power supply and replaced potentially problematic capacitors, allowing the computer to power on and display the boot screen.
In Part 2, I repaired a memory fault that was causing graphical glitches and stopping software from running correctly.
The BBC Micro was now in a state where it could be used as originally intended, yet there was one small issue. I didn't have any way to load or save programs onto the computer, other than typing them in each time I turned it on.
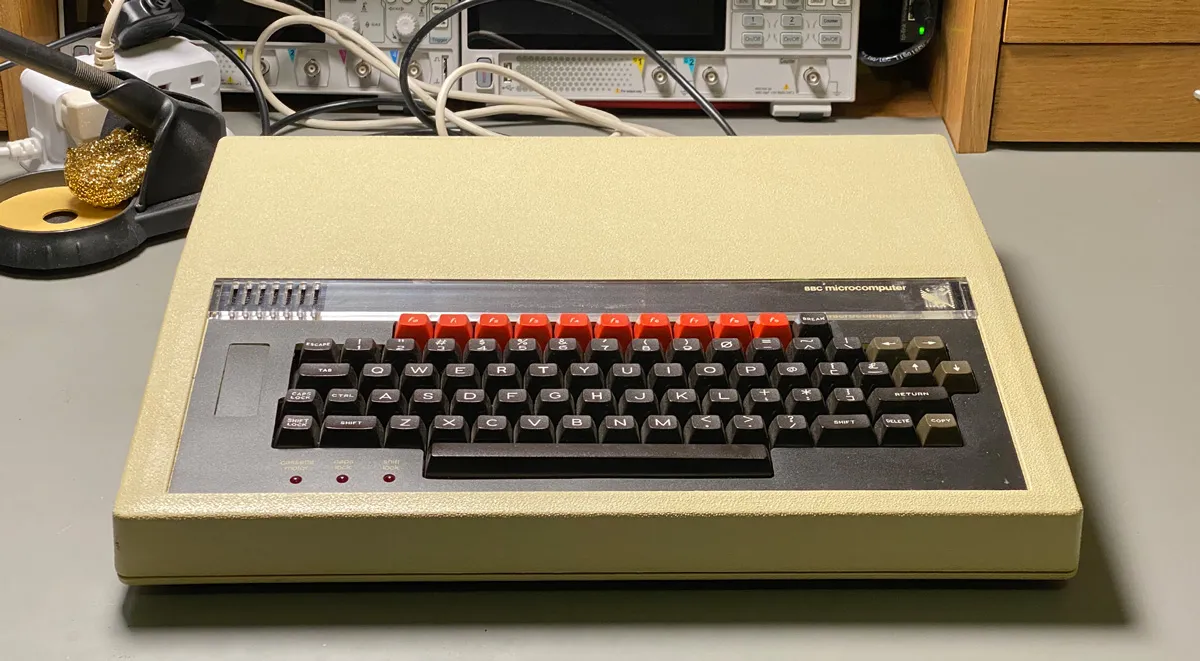
Ready for an upgrade
Storage Options
Acorn designed the BBC Micro Model B with several options for storing files.
Tape
The cheapest and slowest option, and one used by most BBC owners, was the cassette tape. An audio cassette recorder can be plugged into a socket on the back of the BBC, and programs can be loaded and saved onto tapes.
While tapes were cheap and easy to find on most high streets, they were also very slow to read. It could take several minutes to load and save files to a cassette tape, as they were slow and had to be rewound before each use. If several programs were saved to tape, the computer would have to play through the tape until it found the correct program. Not ideal if you have a lot of files saved to a 90-minute tape.
Floppy Disk
The BBC Micro had a dedicated floppy drive port on the underside of the computer that could be connected to up to two 5.25 or 3.5-inch floppy drives. Floppy disks have the advantage over cassette tapes in that they are faster and hold more data. And with faster seek times, you will not be waiting around for the computer to find the file.
While the floppy disk interface in present on all BBC Micro computers the control chips and DFS (disk filing system) ROM needed to use the drive was an optional extra when you bought the computer, and many people did not buy they option, so for many Micro computers available today adding a floppy drive will mean installing the extra chips needed to make it work.
Floppy disk drives came in a range of options; most are not compatible with each other. For 5.25-inch drives, you had the option of single-sided or double-sided with 40 tracks or 80 tracks. Double-sided drives could read single-sided disks, and an 80-track drive could read 40-track disks in some circumstances. If you had a 40-track single-sided drive, you were limited to reading disks that were written on that type of drive.
In 1983, a 5.25-inch floppy drive sold for £190 to £345, depending on the model, which would be equivalent to £649 to £1,179 in 2025.
Hard Drive
Hard drives were available for the BBC Micro later on in its life.
They were prohibitively expensive for most people, in many cases costing well over £1000. Winchester hard drives were available with storage capacities of 10MB, 20MB and 30MB and connected to the BBC Micro 1MHz bus. A ROM was needed to access the drives using the ADFS (Advanced Disk Filing System).
Econet
Econet was a low-cost networking system designed by Acorn for the BBC Micro. It allows up to 254 BBC computers to communicate with each other, sharing files, printers and peripherals. Econet was useful in schools where the teacher could view students' screens from a remote terminal.
There are modern Econet hubs available that run on a Raspberry Pi, allowing you to use the Pi as a file server, making it a good alternative to local storage. The Econet interface was not a standard part of the BBC Micro Model B. It could be purchased as an optional extra when buying the BBC Micro and was mainly used in schools. If it is not already installed, it will require installing extra chips to make it work.
SD Card Interface
While this was not an option when the BBC Micro was built, today you can add storage to the computer using an SD Card interface that plugs into the user port.
Finding the right storage system for my BBC Micro
After evaluating all of the available options, I decided to use two storage methods on my BBC Micro: a 5.25-inch floppy drive and an SD card interface. A floppy drive would allow me to experience the BBC Micro in the way it was originally intended by Acorn. An SD card interface would give me fast and easy access to the hundreds of programs and games available for the BBC Micro.
Adding a Floppy Disk Drive
When the BBC Micro was released, the most common type of floppy drive was the 5.25-inch format. It used disks that were actually floppy, unlike the later 3.5-inch drives that had a hard plastic shell around the disk. 5.25-inch drives are still fairly common on eBay, but I wanted one that was designed for the BBC Micro, so I kept a lookout for the right drive to become available.
The drive I eventually found was a Cumana CS200D, which came in its original box with a manual and cables. It even had the original cardboard insert that was used to hold the heads still during transport.
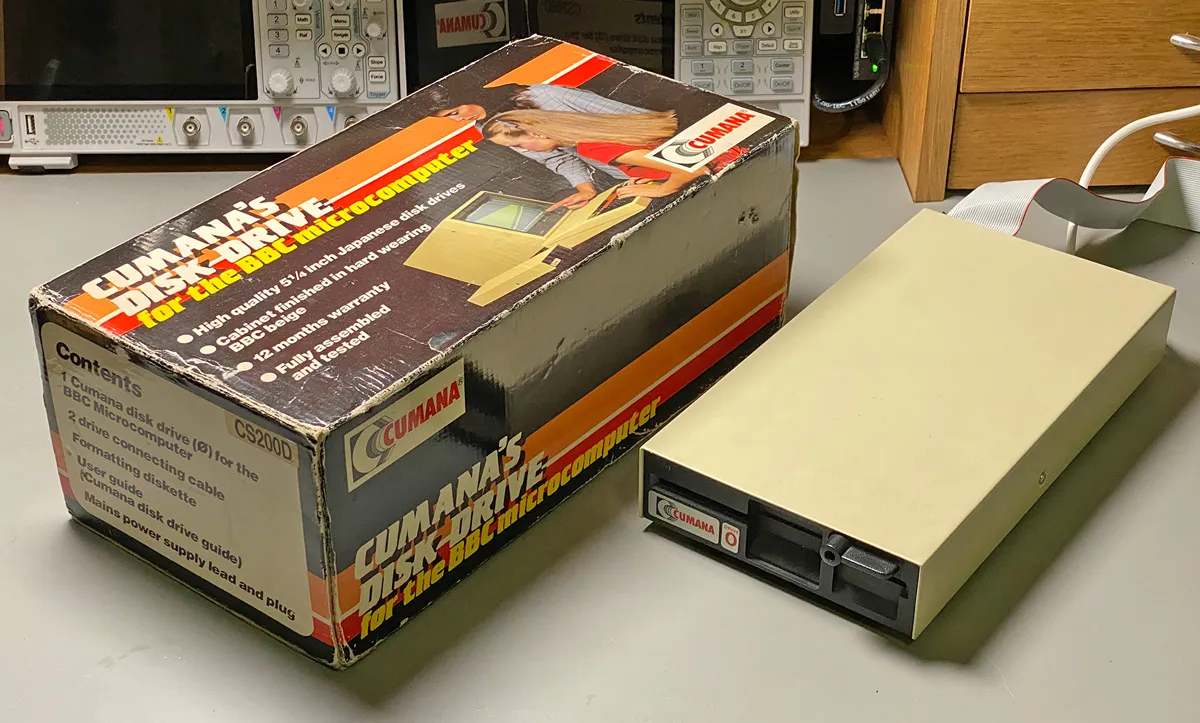
A floppy drive and it's box
The Cumana CS200D is a 40-track double-sided drive, which means it has a 250 Kbyte unformatted single-density disk capacity and 500 Kbytes in double-density recording mode. An 80-track drive would have been preferable, as it would have given me more space for storage and better compatibility with old software disks, but 500K is still plenty of space when the computer only has 32K of RAM.
To use the floppy drive, I would need some disks, and after some searching, I found a collection of 5.25-inch cover disks from Acorn User Magazine and BeeBug Magazine. The disks were dated between 1988 and 1991 and had a collection of games and utilities that I would be able to explore with my new floppy drive.
Before I could use the floppy drive on my BBC Micro, I would need to make a few modifications to the computer. The floppy disk interface was an optional extra when buying a BBC Micro Model B, and my micro did not come with the option installed.
I found a suitable upgrade kit on eBay that included all of the chips needed to use a floppy drive as well as two ROMs, one with the original Acorn DFS (disk filing system) and one with a Watford Electronics DFS which has several useful upgrades from the standard DFS including support for double density disks and a larger 62 file catalogue, allowing you to store more files on a disk.

Floppy upgrade kit
Installing the upgrade kit
The upgrade kit came with a CD-ROM containing installation instructions and a selection of software, PDF books and ROM images.
Installation was fairly easy, but my BBC Micro has an Issue 3 motherboard, so some modifications were needed to the existing components.
The first step was to remove the cover and unplug the keyboard.
Next, install the module containing the 1772 interface chip and several logic chips. This plugged into the IC78 socket on the motherboard. If a chip is already installed in IC78, it will need to be unsoldered and replaced with a socket.
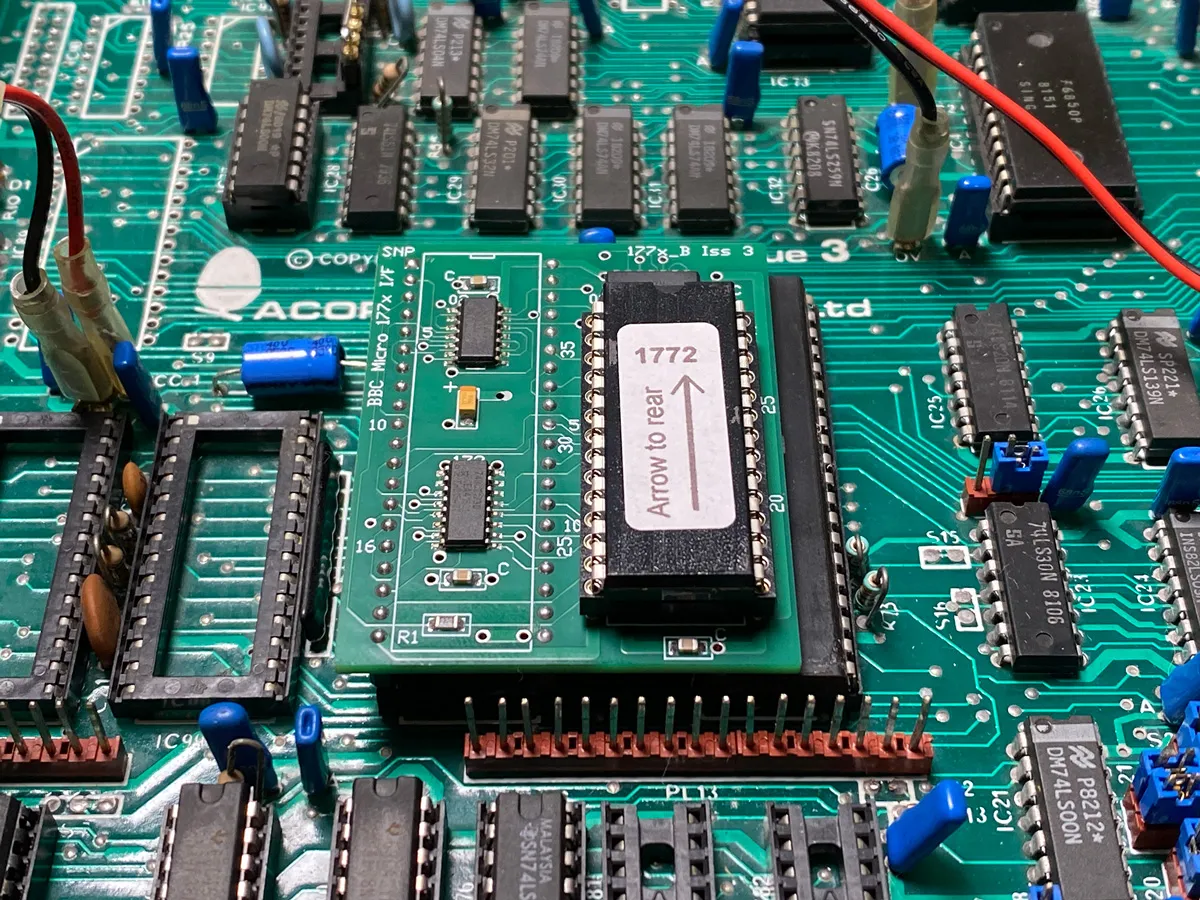
1772 PCB Installed
If the BBC Micro was bought with a disk interface installed, it would have come with an 8271 interface chip. The 8271 was limited to 40-track floppy drives. Not a problem for my drive, but it would mean I could not upgrade in the future, so installing the 1772 is a better option.
Next, I fitted wire links between pins 1 and 4 on IC86 and pins 9 and 12 on IC87. Jumper links were included in the kit for this purpose.
IC86 Jumper

IC87 Jumper
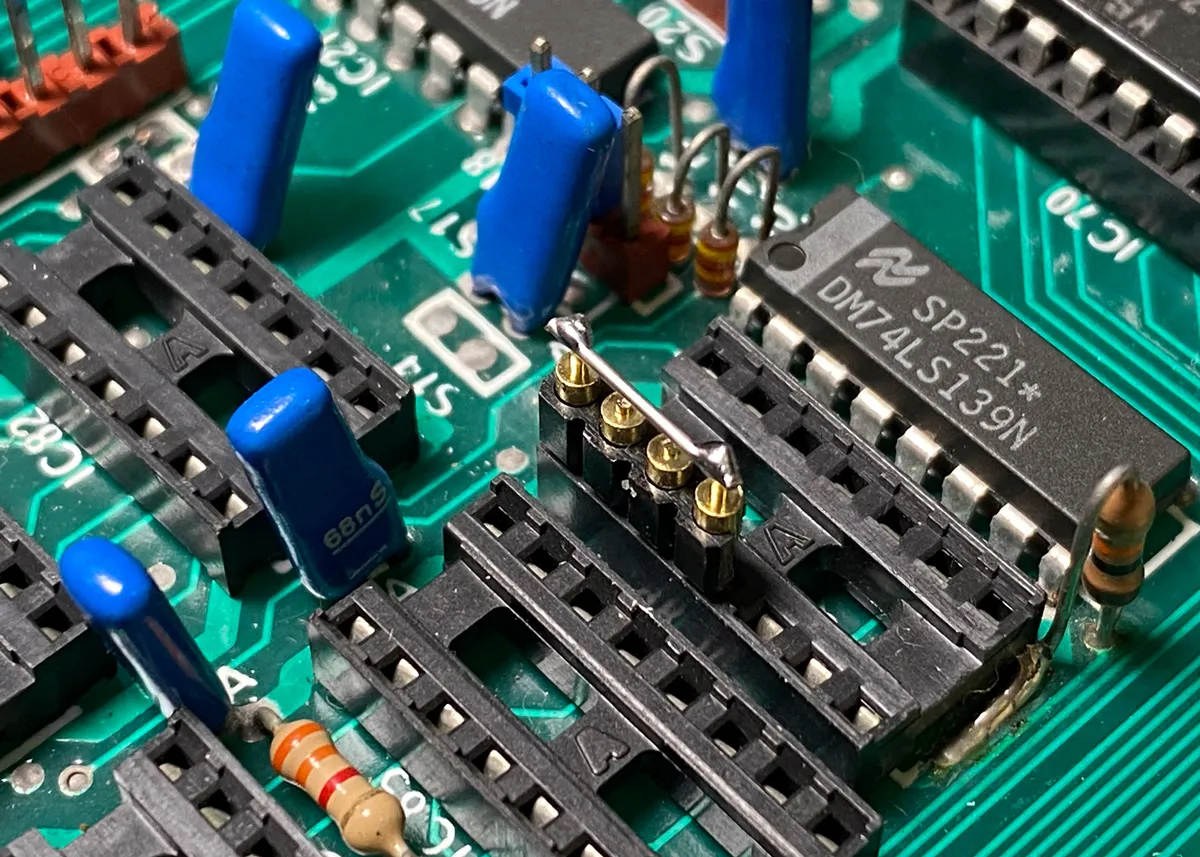
Two 7438 ICs were installed into sockets IC79 and IC80.

Chips in IC79 and IC80
The Watford Electronics DFS ROM chip was installed in one of the spare ROM sockets.
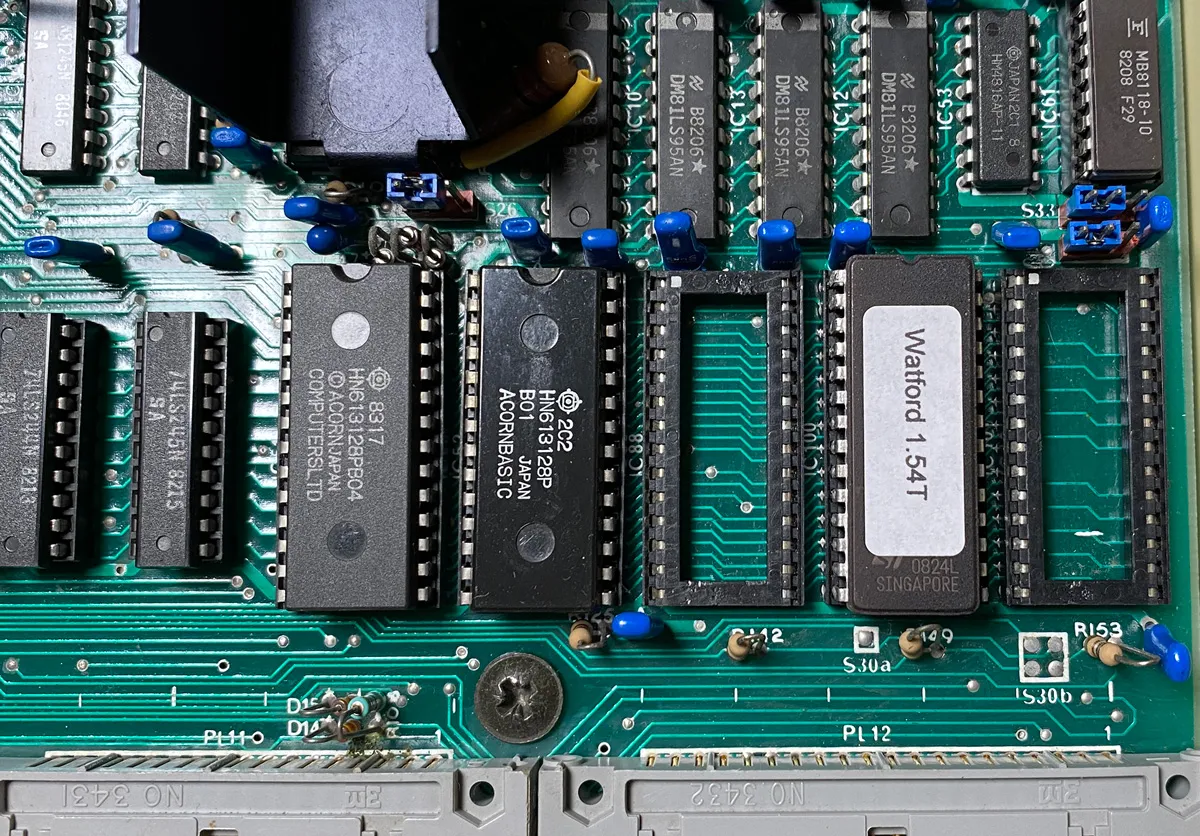
Watford DFS ROM installed
The next step was to make the required modifications for the Issue 2 and 3 motherboards.
On IC27, pin 9 was cut close to the PCB, and the pin was bent out horizontally. The PCB trace on pin 9 was cut, and a piece of wire was soldered between pin 9 and the east pad on link S9. Care was taken to make sure I did not damage any of the other PCB traces or pins on the chip.
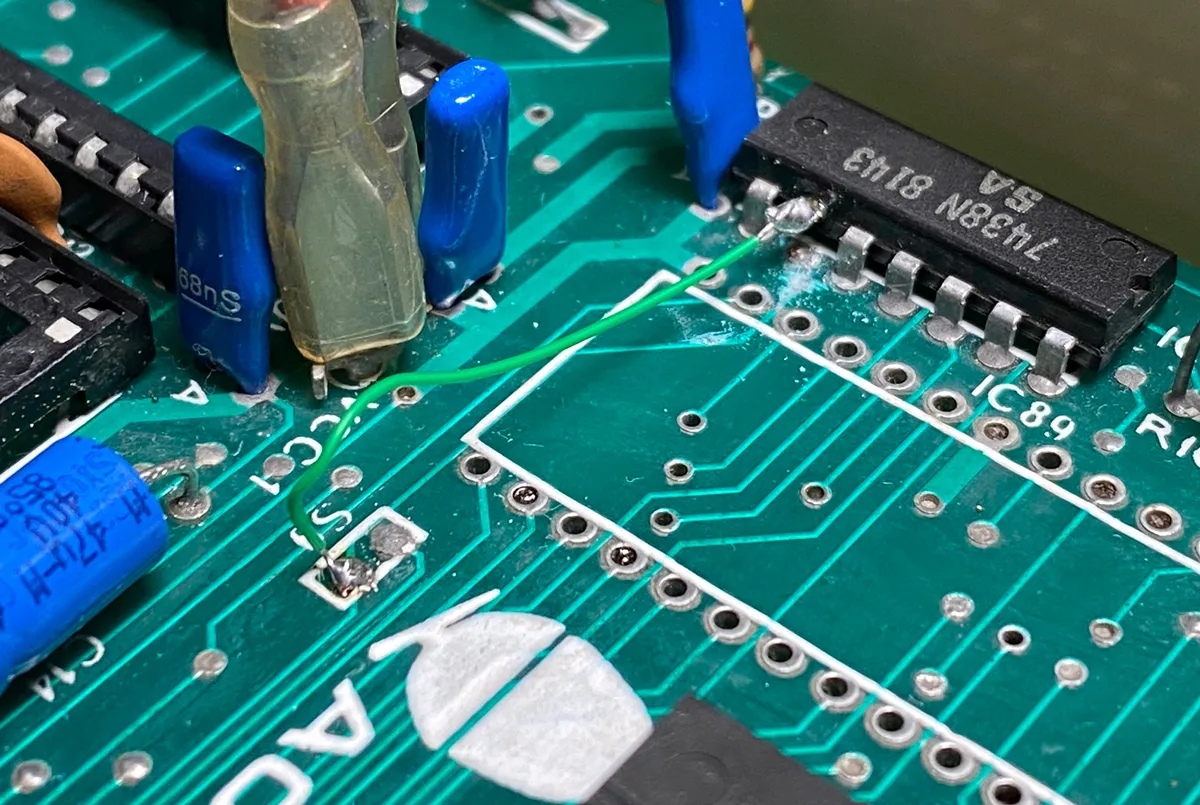
IC27 modifications
With all of the chips installed and the modifications made, the keyboard was reattached, and the floppy drive was plugged into the socket on the underside of the motherboard.
When the computer was switched on, it displayed a new line of text for the Watford DFS ROM, showing that it was loading correctly. I inserted a floppy disk into the drive and attempted to display a list of the files on the disk using the *CAT command.
The drive started spinning and the head moved, but I was greeted with an error “Disc fault 18 at :0 01/00”. To check if there was a problem with the 35-year-old disk, I tried another disk, which showed the same error. Every disk I tried had the same problem, so either I had a box of dead disks or there was a problem with the drive or the BBC Micro.
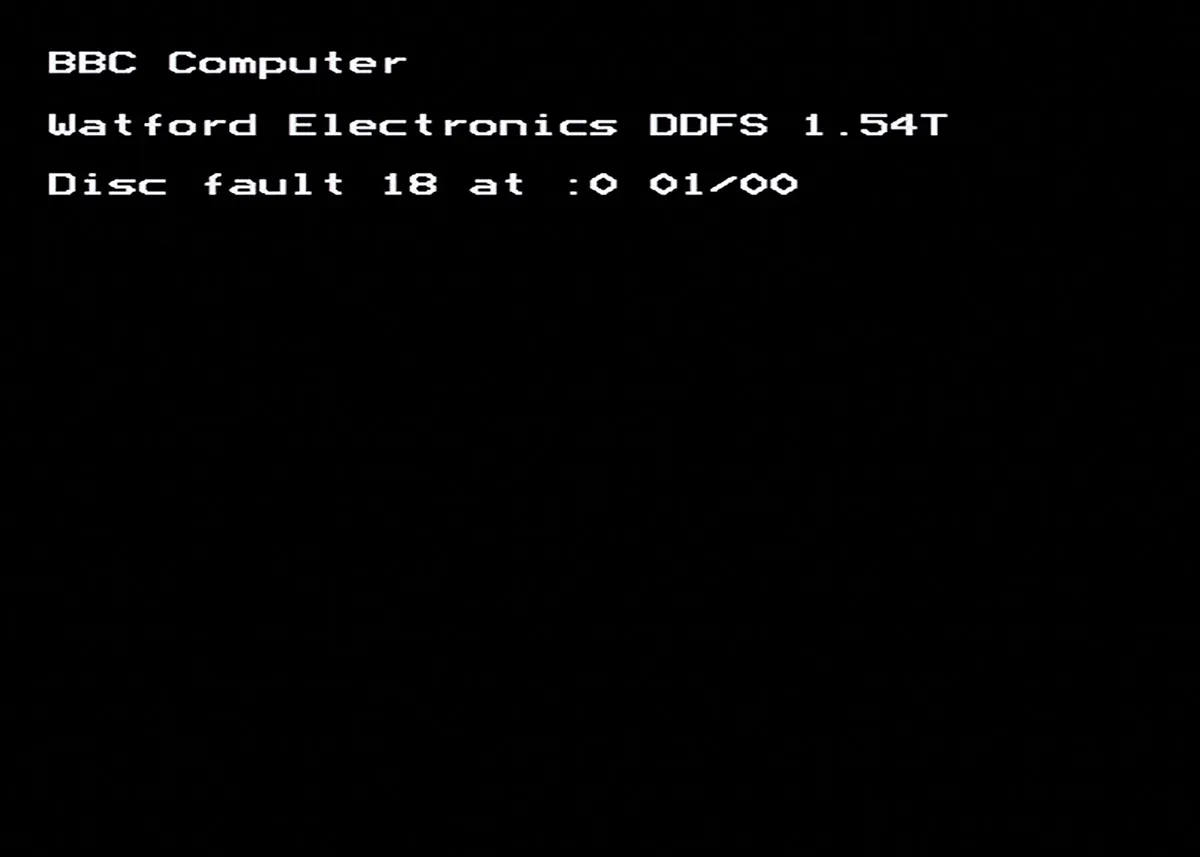
Disk fault
Fault Finding
The first step to find the fault was to check if the floppy drive was working. The disc span and the head moved when I tried to read a disk. That meant power was getting to the drive, but if the power supply was unstable, it could cause the drive to malfunction. First on the list of items to check was the power supply for the floppy drive.
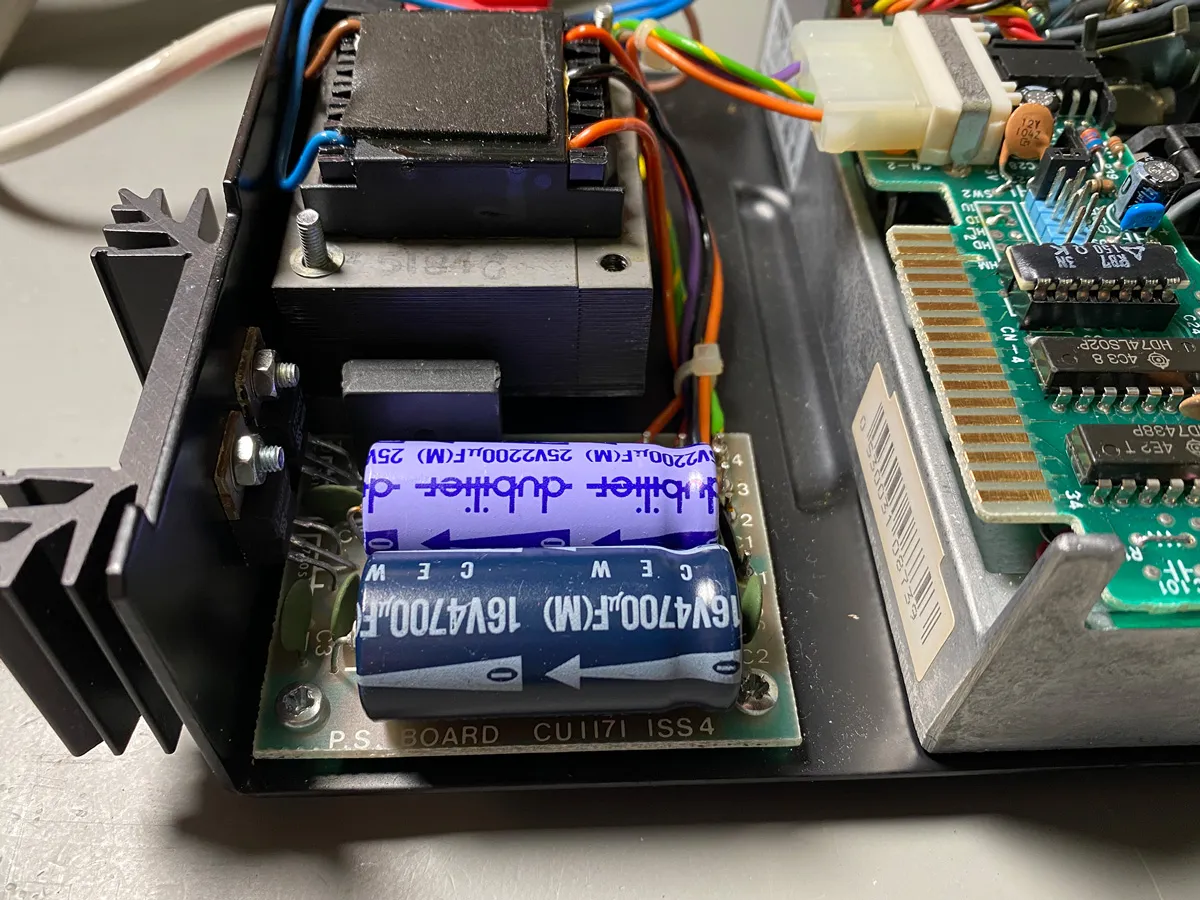
Floppy drive power supply
The floppy drive had an internal power supply with an IEC socket on the back, so I removed the cover to check the supply voltages. The power supply was a simple design using a transformer to step the voltage down, a bridge rectifier and two linear regulators, a 7805 and 7812, providing the 5V and 12V supplies that the floppy drive needed. Each regulator had a large electrolytic capacitor for smoothing and some small ceramic capacitors for noise filtering. Electrolytic capacitors can fail with age. I unsoldered one end of each capacitor and tested it with an LCR meter. Both capacitors were within tolerance for capacitance and ESR, so they were soldered back in place.
Next, I connected the power supply to the mains, switched it on and measured the output voltages on each regulator. Both were outputting the correct voltage, so that ruled out a problem with the power supply.
To test if there was a fault with the floppy drive itself, I connected it to a Greaseweazle USB interface that I had previously bought for another project. The Greaseweazle lets you use the floppy drive on a PC. It can read and write to floppy discs in a wide range of formats, including those used by the BBC Micro. The floppy discs I had bought, which originally came with Acorn User magazine, were formatted with 40 tracks on one side and 80 on the other. To read them on my 40-track drive, I used the Acorn DFS SS format in the Greaseweazle software.
gw read --format=acorn.dfs.ss disk1.ssd –drive=0
The drive spun up and started reading the disk. It read all of the tracks from the first disk without any errors. I tried reading all of the other disks I had bought, and out of 20 disks, 18 of them read without errors, while two failed to read several sectors. A good success rate for disks this old, and far better than the 3.5-inch disks I have bought.
I tried formatting one of the disks, wrote a disk image onto it and then read it back. I compared the original disk image with the read one, and it showed no errors, so there did not appear to be any faults with the disk drive. That meant that the problem was with the BBC Micro.
I went through the installation instructions that came with the disk interface kit to ensure I hadn't missed anything, but I couldn’t find any problems. I swapped out the Watford DFS ROM for the Acorn DFS ROM, just in case there was a compatibility issue with the floppy drive or disks. Changing the ROM showed the same error.
Finally, I removed all of the chips I installed, polished the pins on the chips and the sockets and reinstalled them. I did the same on the floppy drive connector and cable, and plugged it back in. This time, when I tried running *CAT, it returned a list of the files on the disk, and I could load and run the programs on the disks without any errors. It appears that the problem was corrosion or a faulty connection on one of the pins.
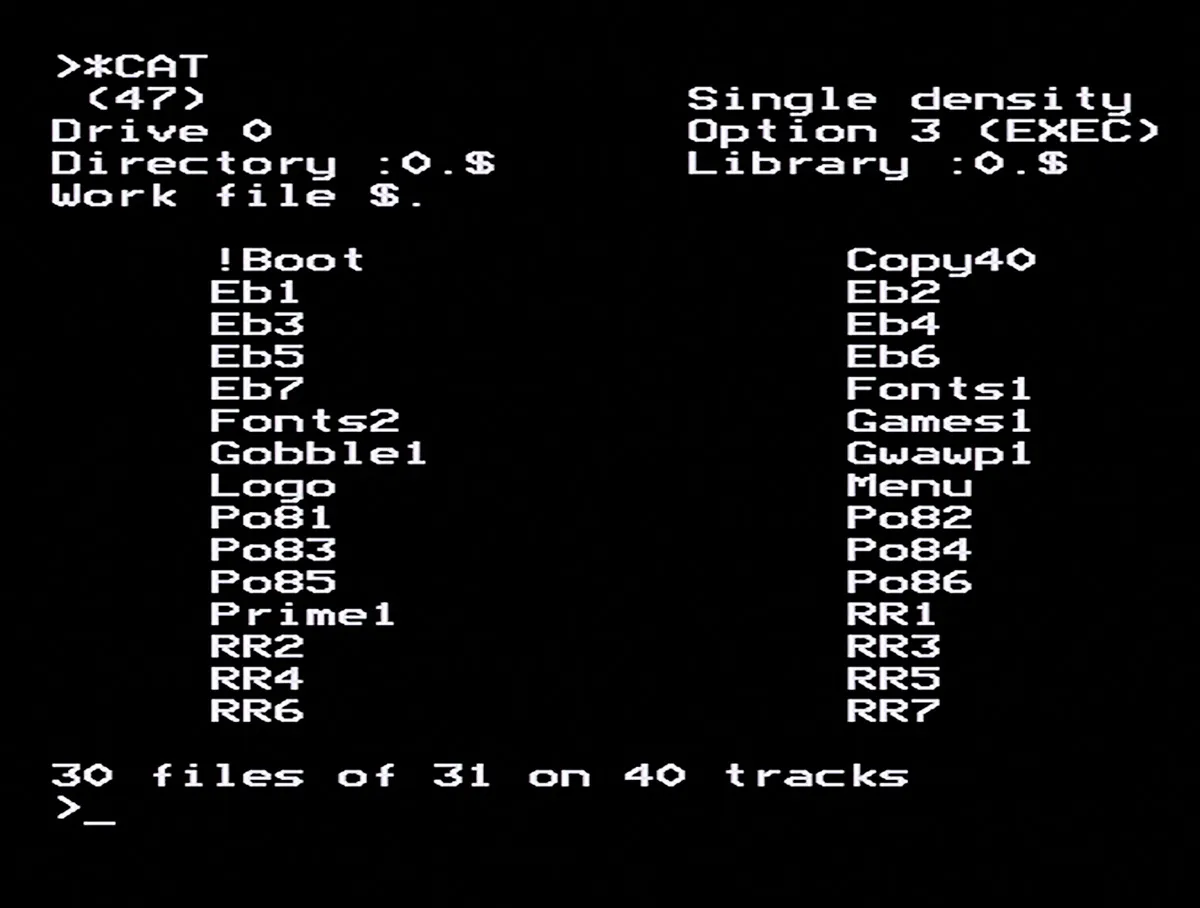
Files on the floppy disk
I now have a working floppy drive and 18 disks full of old programs to play with.
Adding an SD Card Interface
Compared to the floppy drive, the SD card interface was easy to install. The interface plugs into the user port on the underside of the computer, and the Turbo MMFS ROM is installed in a spare socket on the motherboard. You can then access the SD card in the same way you would with a hard drive. Or at least that is the idea.
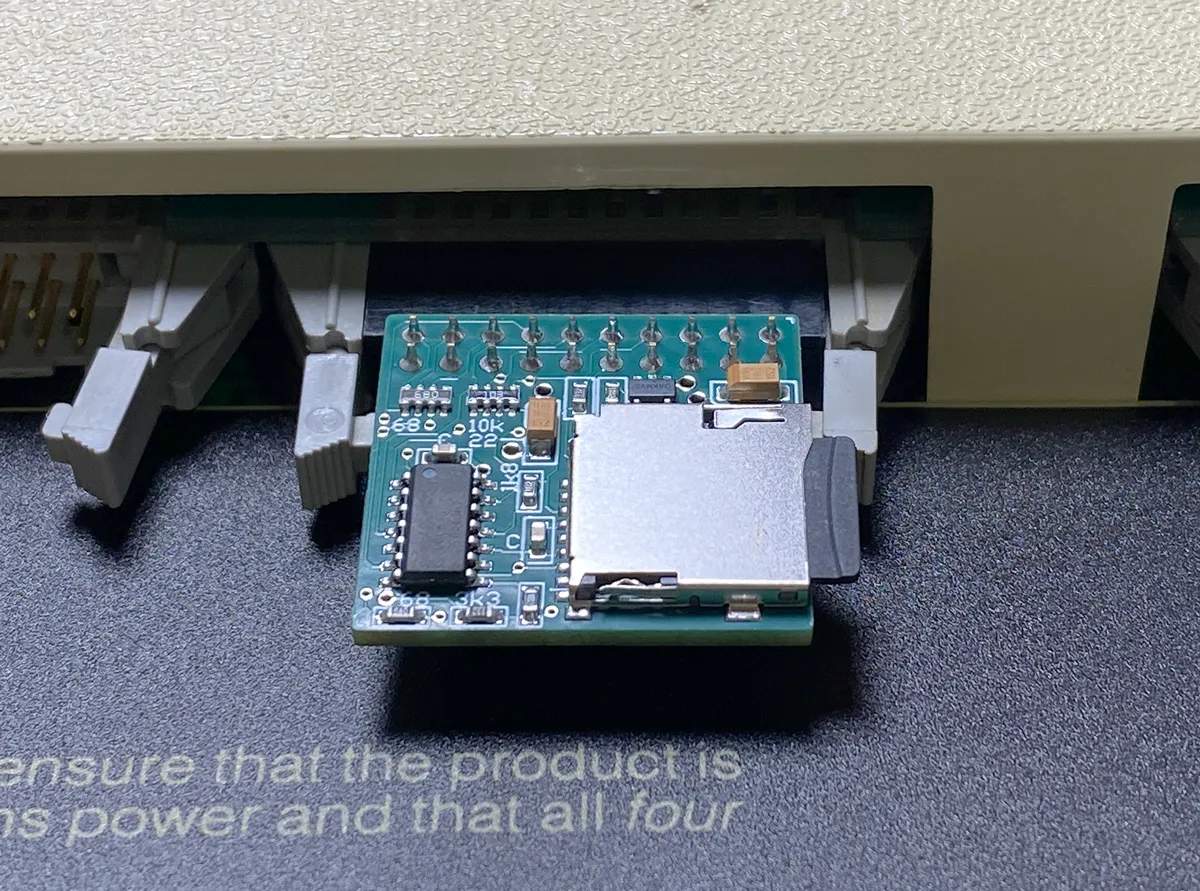
SD Interface Installed
Once I installed the Turbo MMFS ROM, I found a new problem: the floppy drive DFS ROM was no longer accessible. I tried swapping the position of the ROMs on the motherboard, but when I booted the computer, the floppy DFS ROM was loaded, but not the Turbo MMFS ROM. It appears there is a conflict between the two ROMs, possibly because they use the same commands to access files on the drives.
After much searching, I eventually found someone else with a similar problem on the Stardot forum. The recommended solution was to use the Advanced ROM Manager to manage the ROMs installed in the BBC Micro. I downloaded the Advanced ROM Manager image and, using my T48 programmer, I burned the image to a ROM chip.
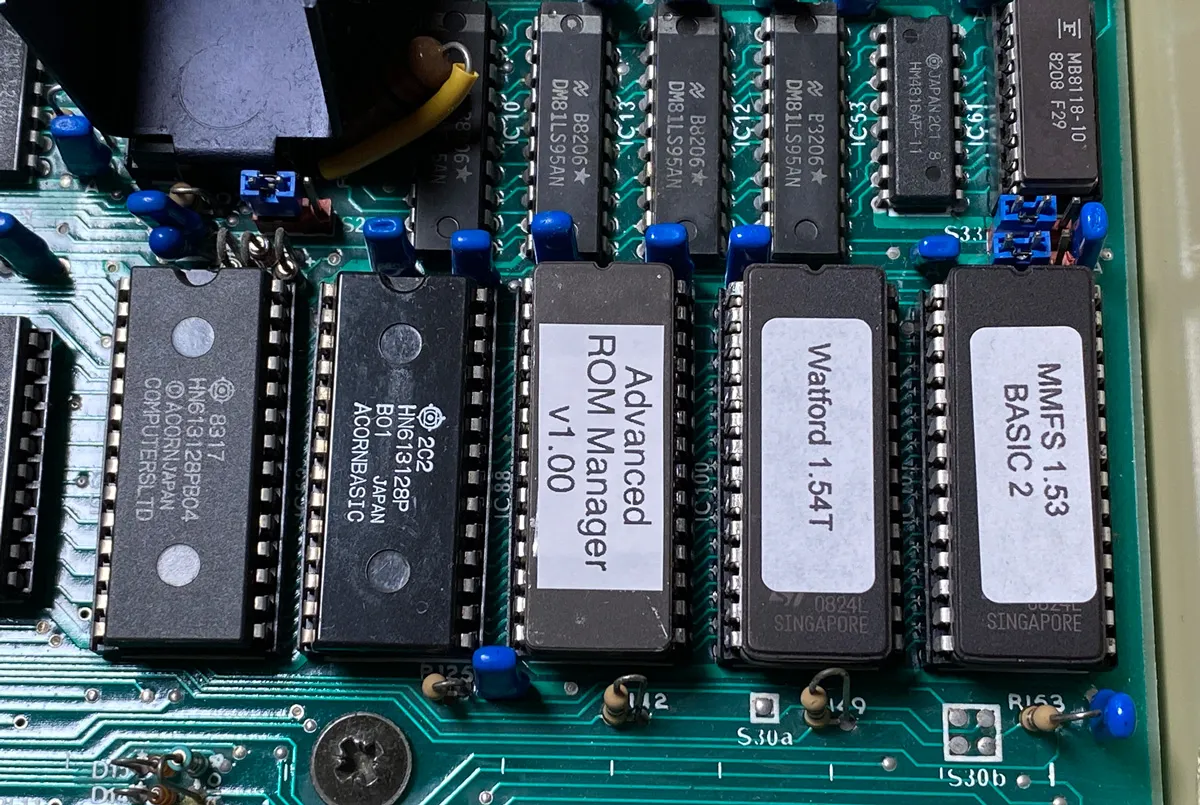
Roms installed
I installed the new ROM into the BBC Micro and turned it on. When it booted, it still only loaded the Turbo MMFS ROM, but I was now able to use the *ROMS command to see a list of the installed ROMs and the *KILL command to disable the MMFS ROM. With MMFS disabled, I was able to access the floppy drive. Any changes made using the Advanced ROM Manager remain after a reboot using the Break key, so I was now able to boot from magazine cover disks and see them as a BBC Micro user would have done 35 years ago.

Games to play
Final Thoughts
I now have two methods for loading and saving files on the BBC Micro, making it a far more usable computer. With the floppy drive, I can explore my old magazine cover disks as well as save my own programs to disk in the way Acorn intended. With the SD card adapter, I have access to hundreds of games and applications and a fast way of loading them onto the computer, so I can see what games people used to play on the BBC Micro.
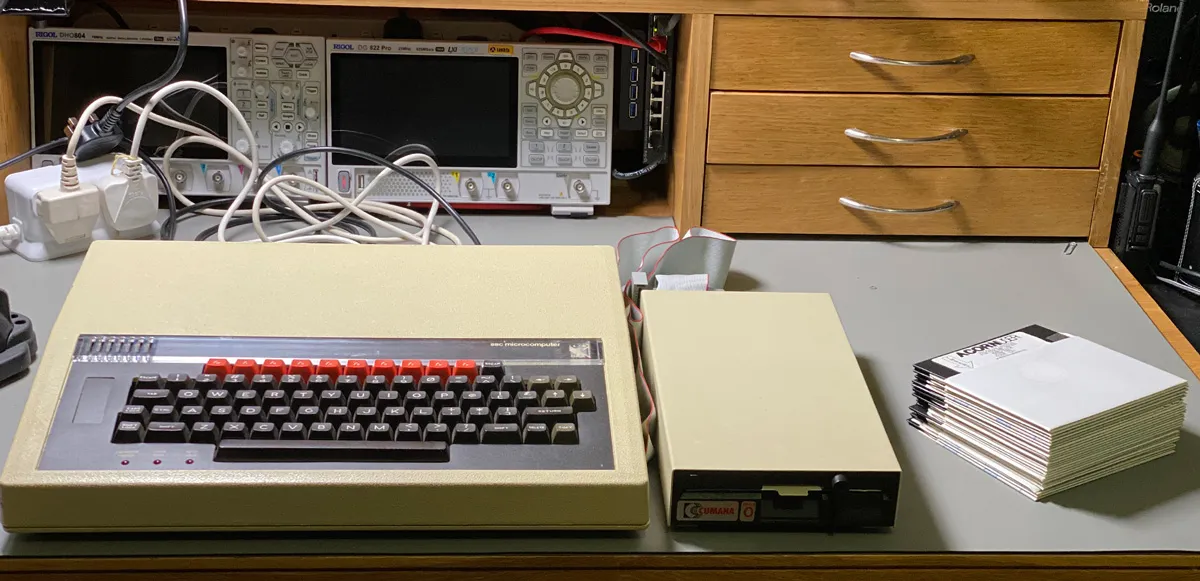
Upgrade Complete
One small problem I now face is that all of the ROM sockets on the motherboard are full, so I can't add any extra functionality to the BBC Micro. This problem can be overcome by adding a sideways ROM expansion that adds extra sockets on a daughter board, allowing a maximum of 16 ROMs to be installed. I may add a sideways ROM expansion to my BBC Micro in the future. For now, I have upgraded the computer to a state where it is usable for my needs.
My long-term plan is to design a computer of my own based on the 6502 microprocessor, the same one used in the BBC Micro. Buying the BBC was a stepping stone on that journey. It allows me to get to grips with 6502 assembly language and learn how the CPU architecture works. By studying the BBC Micro as well as looking at other 8-bit computers from that era, like the ZX Spectrum, Amstrad CPC 464 and Commodore 64, I can look at the challenges the designers of those computers faced, learn the best way to solve the problems that I will face when designing my own computer, and hopefully make fewer mistakes along the way.